Childhood Memories
 I'll never forget the day as a kid an older cousin
Billy showed me his "new
ride." It was a 1957 Olds 98 2 dr. Hardtop. As all kids
did then, I thought that you had to have a 57 Chevy. It was from that moment,
however, that I was convinced of the beauty, power, and technical advances
of the Oldsmobile. And still to this day I think that the 57 Olds epitomizes
that era. Those rear quarter windows are so classic!
I'll never forget the day as a kid an older cousin
Billy showed me his "new
ride." It was a 1957 Olds 98 2 dr. Hardtop. As all kids
did then, I thought that you had to have a 57 Chevy. It was from that moment,
however, that I was convinced of the beauty, power, and technical advances
of the Oldsmobile. And still to this day I think that the 57 Olds epitomizes
that era. Those rear quarter windows are so classic!
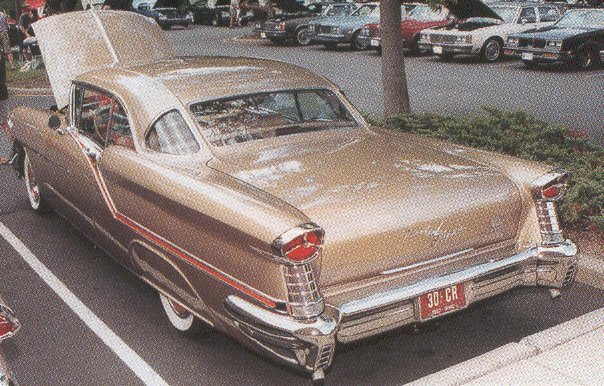
Another recollection is the year 1963, I'm sixteen years old and my father's
brother comes over to show us his new car. When is the last time you saw a
'63 Burgundy on Burgundy 98 Holiday 2 Dr. Hardtop? The car was longer and sleeker
than anything I could recall. Sheer "American Beauty" on wheels. I
was always fascinated with cars, never had a new one as a kid, but new from that
moment what I wanted.
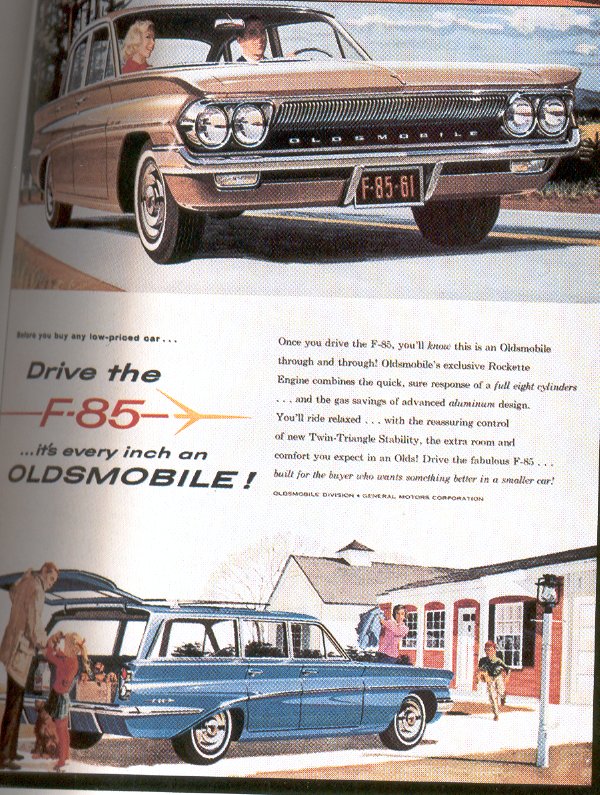
I didn't realize as a younger man that Oldsmobiles would mean so much to
me. My first one was an early 60's F-85 Station Wagon that I bought from
my cousin Dan for under $50. Dan had a different Chevy every six months. I
don't know how he ever came across this Olds.
Early Driving Years with Oldsmobile
I needed a "junk car" to drive to work and park in questionable
areas. The year was 1968 or 69. My concerns then were on my career
as a new high school teacher and not on the condition of my clunker. I
couldn't tell you what options or motor it had. Come to think of it, I may
never have popped the hood. I do remember that the latch to the hatchback
was broken and every time I gave it the gas it would swing open. I also
remember some of my students laughing at the condition of the car as I parked it
on the streets in the neighborhood. As I think back I didn't keep it for
long. My loss now.
In search of Oldses.
Time has passed and I am retired after a teaching career of 34 years. I can
happily say that I have more time to "play with cars". I read Hemmings each month
just to see what's out there. Years ago I saw an ad for a 67 Cutlass
Convertible in the next county. It was summertime, I was on vacation so I went
to see it. It wasn't a 67 but rather a 69 with a big block in it. I
called the owner and informed him about what he was selling. He really
didn't care; he just wanted it off his rental property. I struck a deal for
$750.
After getting it home and checking numbers, I found that the motor had been
replaced with a 425 Toronado engine. It had major "blow by"" and for sure had
been abused. I limited my repairs to only the immediate needs: a gas tank, a spare Quadrajet
carb I had rather than the Holley double pumper that was on it, tires, some trim parts, and a lot of elbow grease. I decided I
wasn't going to sink money into a car that when you jacked it up from the rear,
you couldn't open the doors. That sure told me that not only was the
engine tired but so also was the frame.
From a distance I got it to look pretty good.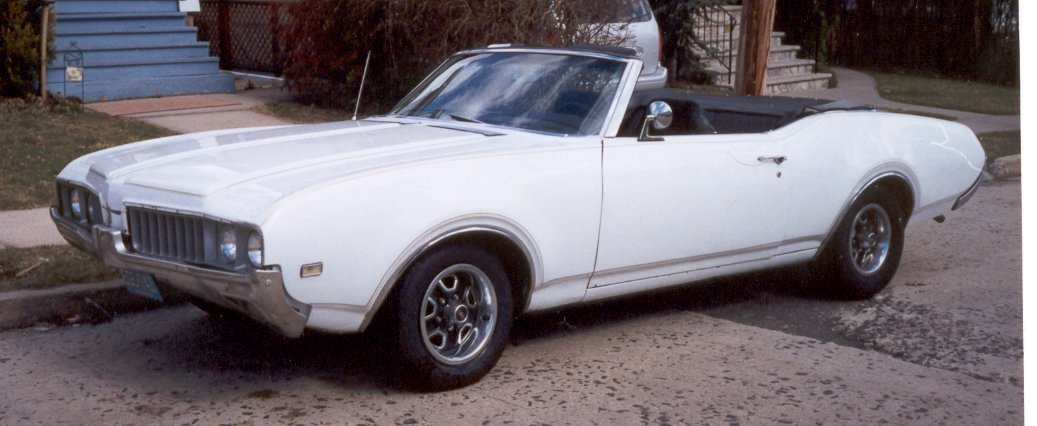
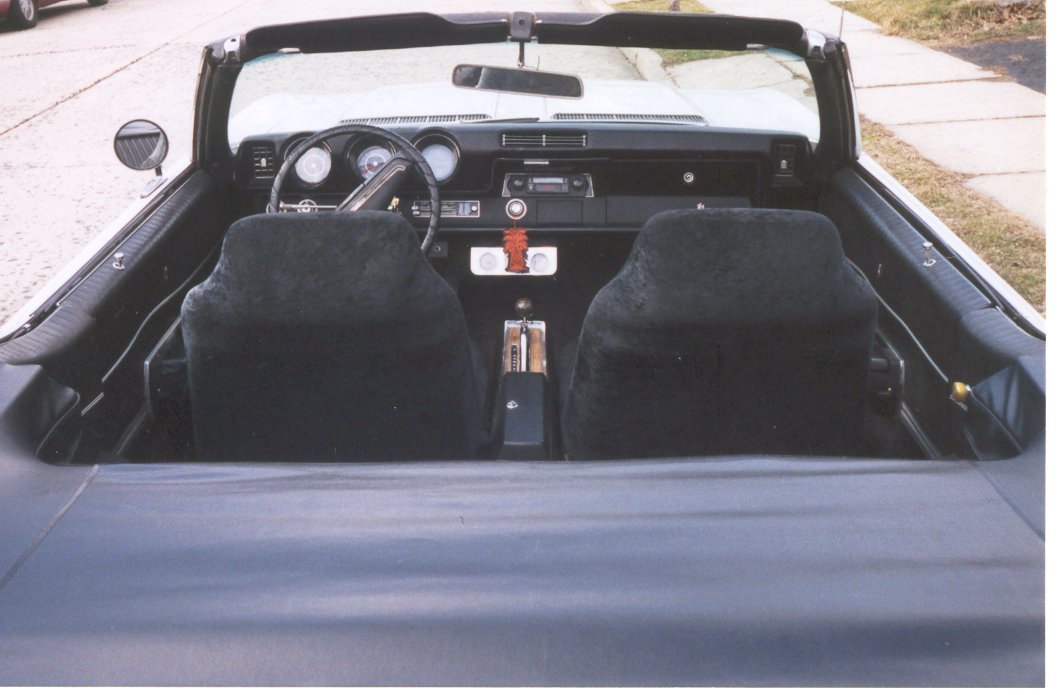
The best thing about it was that it was a convertible. How
sweet they are with the top down!
The bottom line is that after six months of use by my
son ( in need of transportation because his earlier truck was stolen) I sold the car for
more than
three times what I paid for it.
My Son and Olds
Upon returning from a February 2001 vacation with my wife, we were
surprised to see something "new" sitting in our driveway. The Mrs. quickly
looked at me and gave me a look as if I had done something behind her back.
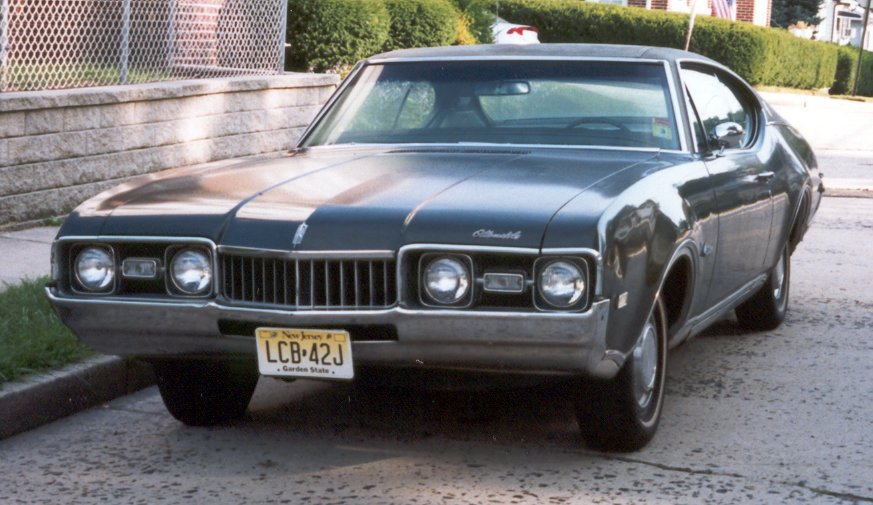
There sat a '68 Cutlass Supreme Coupe. After a few moments for me to
reassure the Mrs. that I had nothing to do with it, she quickly said, "Like
Father like Son!"
My son is a Mopar man and at the time his new 5.9 Dodge RT Pickup was his pride and joy.
So what is he doing with this thing? Well my wife was right; Like Father
like Son.
He had an office in the inner city where parking was at a premium.
He said to me, "Dad, I can't take my truck to work and worry about it, so I just
happened to see this Olds for sale."
It had 91k miles on it with the original Rocket 350, 4 barrel
Rochester carb, and Powerglide Transmission. All things being
considered it was in good condition.
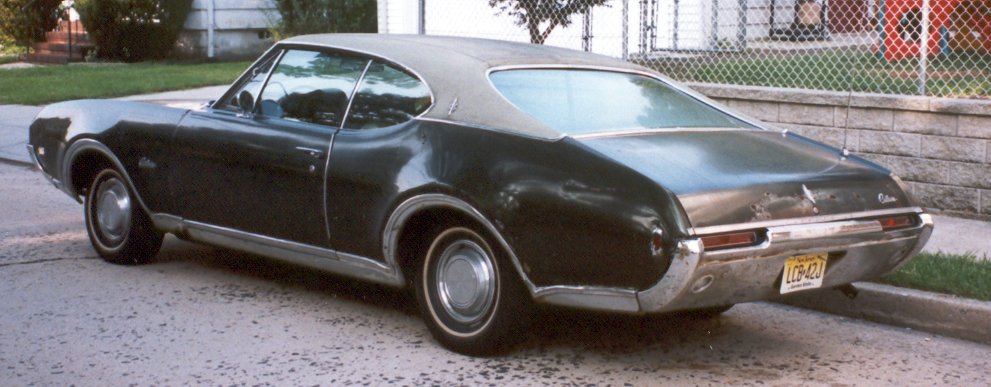
Quite frankly it was worth more for its parts than it was
as a car. No dents to the hood, grills, or front bumper. The
interior was intact with the original am radio still working. The rear deck
had a little surface rust and the rear bumper needed some work. Other than
that it was a fine every day commuter car.
Update: The car was sold awhile back on eBay to a fellow in Ohio.
He drove a rental out to Jersey with a friend, paid for the 68, dropped the
rental off at Newark International, and drove back home in the 68. He had
a little excitement with the carb flooding that almost caused a fire. He
has since notified me that all was squared away and that the 68 Cutlass is on
it's way to a restoration. Oldsmobiles Forever!
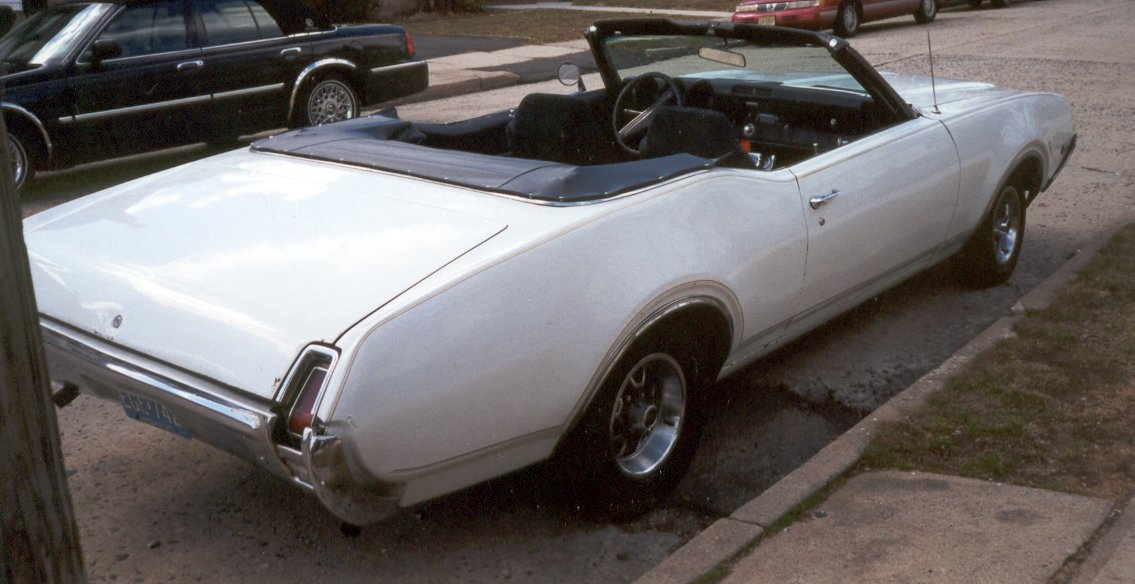
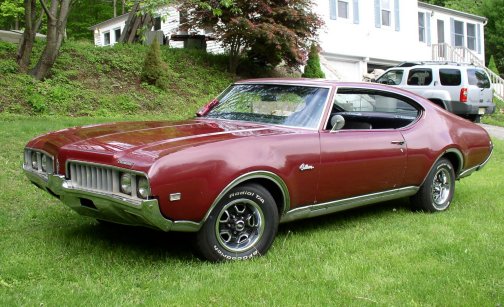
My son is a Mopar man and his 69 Plymouth Road Runner is his dream
ride. But "Like Father like Son." He later purchased a
69 Cutlass Supreme Holiday Coupe to use as an everyday driver. The car was obviously painted a different color. John
foresaw a day in the future when he would return it to its original Meadow Green Metallic with Parchment
Interior. Trim code also defines that the car had a Green Vinyl top.
From the pictures you can tell that someone took it a long way from
original. Yet nothing has been ripped out of the car It was highly
optioned with AC/PW/Trunk Release/ Rear Defogger/Power Antenna/ and Cruise
Control.
My son was impressed with how reliable and how well this old baby still
performed. I guess telling him
all these years just wasn't enough. He had to experience it for
himself. He loves to research all the 'what if ' performance options that
are out there today and goaded me on with the implication that he was considering
modifying the 350. I told him don't touch it if it 'ain't' broken. He
called Mondello to discuss head specs only to find out that the #5 heads he
already had were equal in performance capability to after market stuff that he
reads about. We discussed cam specs and the like until I finally have to say
it again - " Leave it alone and enjoy it until the time comes for a
restoration.
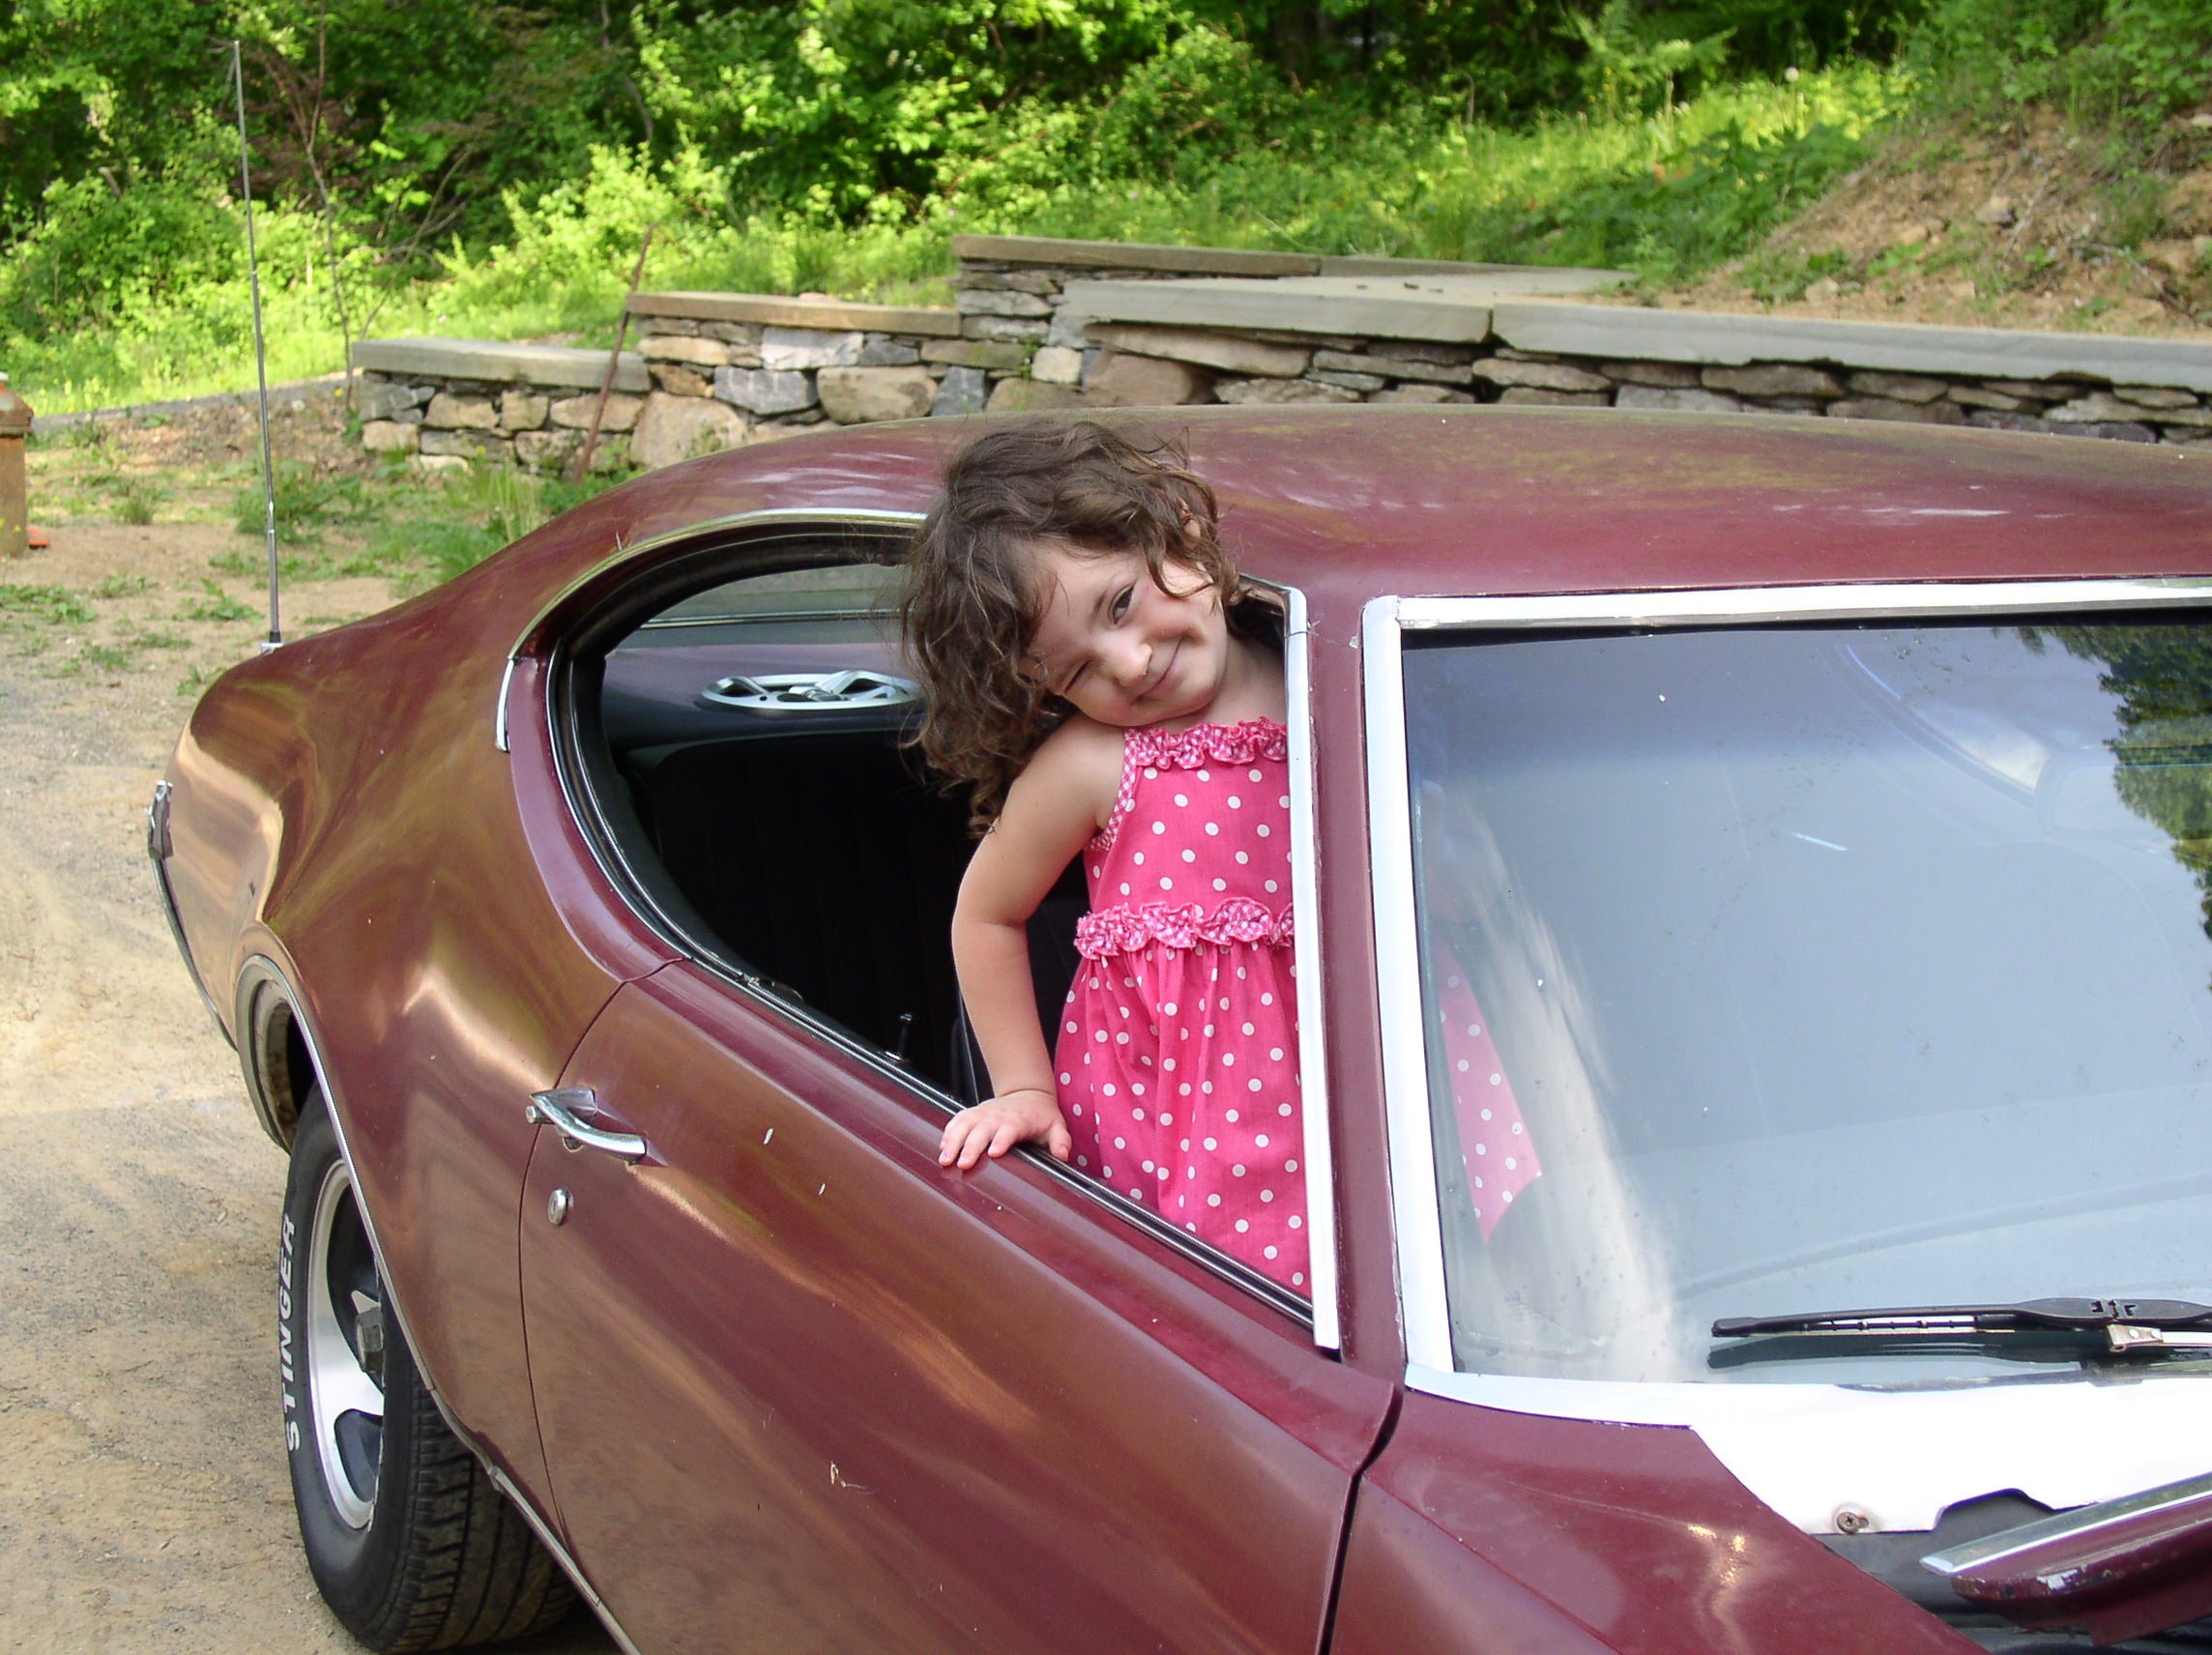
Sophia is my Oldsmobile Grand Daughter
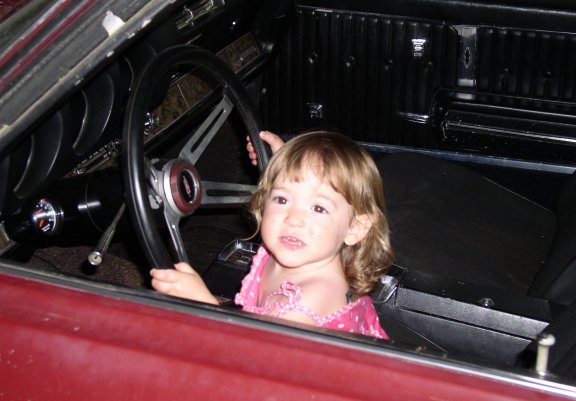
My Nina went to the Dark Side.
She prefers her Daddy's Mopars
The car was sold and replaced with a 73
Plymouth Barracuda. Info and pictures will be
included at a later time.
Most recent Past Olds
I've known about this car for quite awhile. The
former owner is an in-law to my daughter and occasionally when we met socially
we would talk about the car. He's had the car for 20 years or so and drove
it sparingly. In that time he collected many replacement parts in the
event of future need or just because they one day could never be found.
'V'
never lost his love for the Starfire but his hobbies and pastime interests did
not include cars any longer.
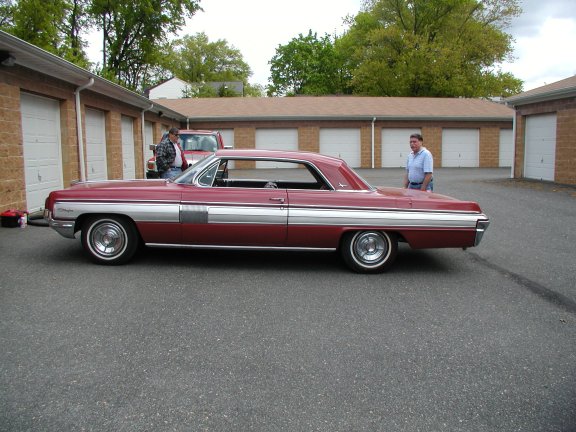
' B' ( My daughters father in-law), recently informed
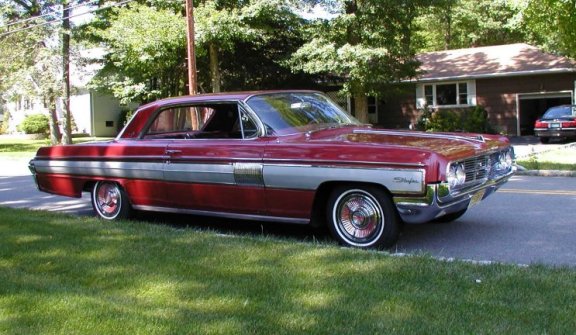
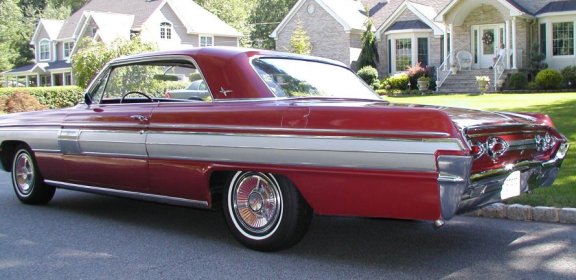
me that 'V' was thinking about selling the 62. It didn't take me
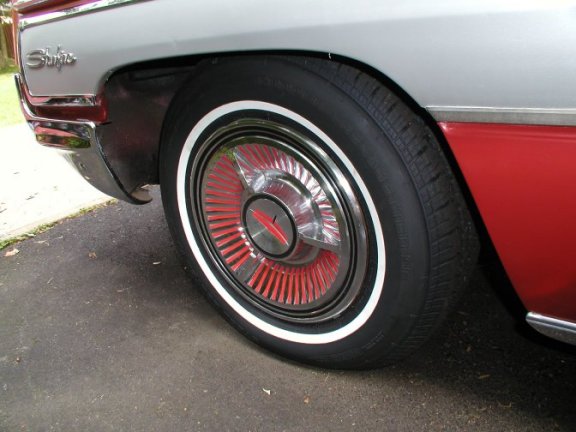
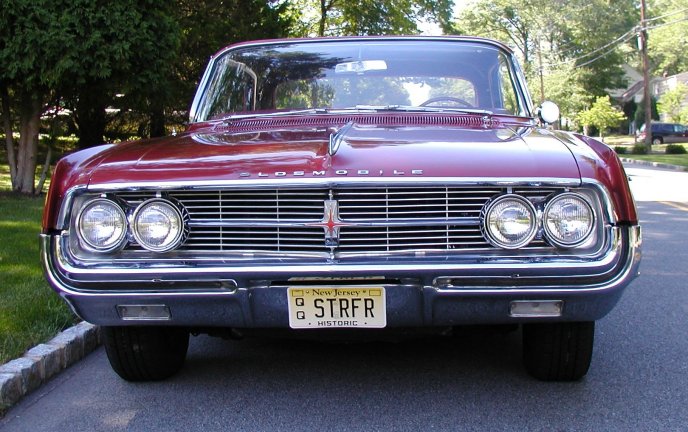
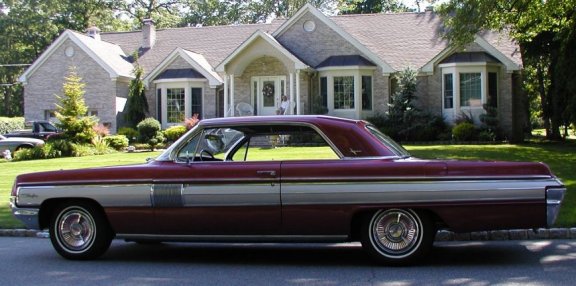
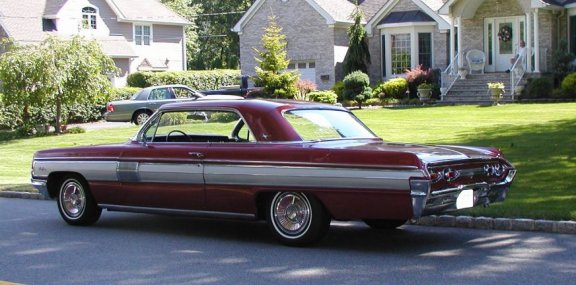
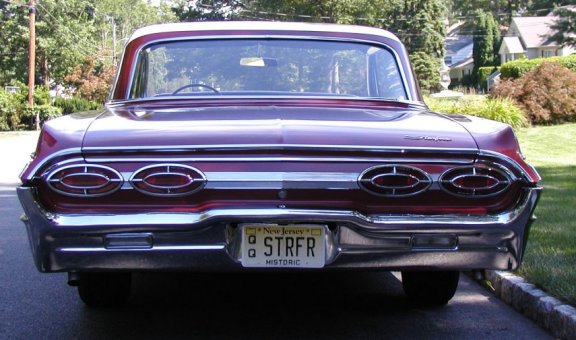
long to make a deal. So on May 6th, 2010 The 1962 Garnet Mist Starfire
Coupe joined my Oldsmobile Coral. Prior to driving the car home it took
many trips with my pick-up truck to get the numerous parts. All are
in storage for eventual use.
'B' to the left --- 'V' to the right
and of course The Starfire in the foreground

6/18/10 Update
Restoring the mechanics of the Starfire has been a challenge as well as a true learning experience as to the 'luxury priorities'
of the times,
the methods of achieving them, and the technologies available at the time.
Before attempting to tackle any of the issues, I purchased both the 1961 and
1962 Oldsmobile service manuals that are now available to download on line.
First let me say that I'm not a purist in the sense that all
must be as it was from the factory especially when it comes to performance,
emissions, and safety. I take care to keep the original appearance and would
not do anything to detract in that way ...... so gone are the points and condenser and Pertronix components were
installed in their place. New higher output coil, wires and spark plugs as well were
installed. The valve cover ventilation tube that literally dumps the
internal gases below the car is totally unacceptable by today's standards.
I discretely installed a bypass hose to the side of the chromed vent pipe and
ran it to the rear of the air filter base where I installed an in-line PCV valve
to re-circulate the gasses for further burning. I removed and stored away the bias-ply tires and replaced them
with 60's style radial whitewall tires. The ride improvement, as well as
handling and stability were amazing. And to think that when I was a kid, we all ran around on those
earlier styled tires!!
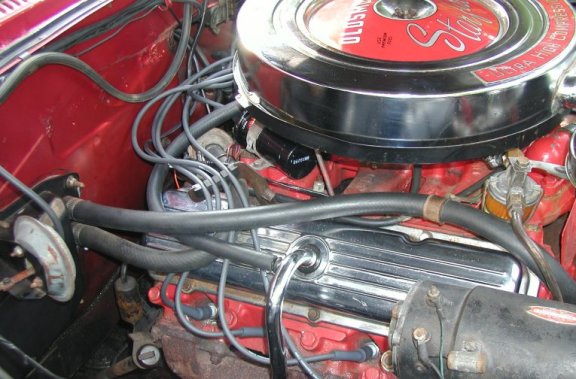
Cooper 215/75R14
By-pass hose installed to side of 'Dump Tube'.
FUEL
Fuel delivery was an issue and required some
compromising. For years the car was running with the assistance of an
electric fuel pump mounted to the frame on the passenger side just in front of
the rear tire. The original double diaphragm fuel pump was in place and
obviously not working. The second diaphragm was required as a vacuum assist
for the heater and ventilation of the interior. ( We'll cover that later.)
After removing the electric pump and learning that it was putting out 9 p.s.i.
of fuel, I knew why the former owner had problems with starting and over all
performance of the car. I purchased a rebuild kit and took the pump apart
only to find that someone had been there before. The fuel diaphragm was
cracked and the vacuum diaphragm was missing and all ports sealed over
with silicone. I removed the silicone and installed the
proper diaphragm and spring. Thinking that I was done, the
pump was installed for a test only to find that I was not pumping any
fuel. I took it down and retraced all of my work. I've since
concluded that the pump arm is not the original and as a result was not riding
on the fuel eccentric properly. The pump has been stored away.
So I decided to buy a replacement single style pump from the
only source I could find which was AutoZone. I elected to worry
about the vacuum assist aspect of the second pump at another time. I
installed the pump and success; the car ran but with a loud clicking
sound. Quickly I took it out and examined it. The pump arm wear showed
that it was just barely reaching the eccentric rather than riding nicely on
it. So, I extended the arm by welding an extension on to it and grinded it
smooth. All went well and success at last.
VACUUM
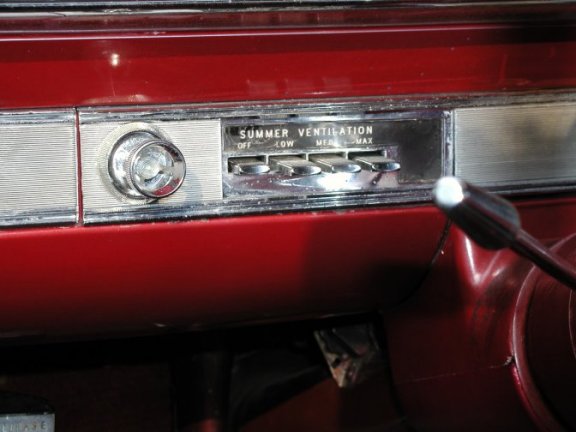
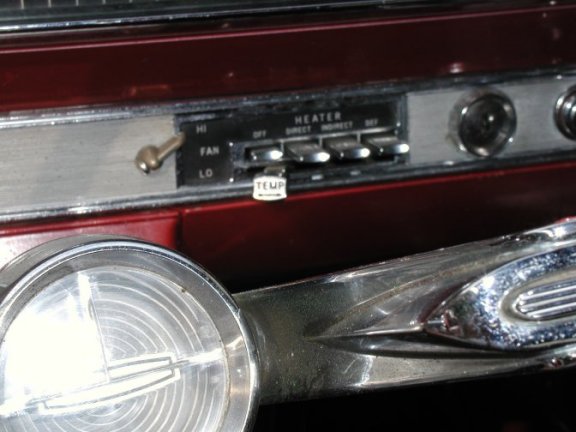
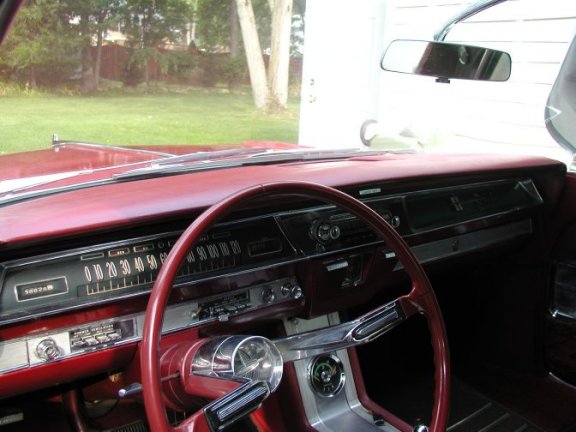
It appears that vacuum was the preferred method to do
simple tasks. To the left of the steering wheel on the lower dash is a
series of push buttons that control the side panel vents and blower motor when
required. To the right of the wheel is a series of buttons that control
the blower motor, defroster, and indirect and direct venting ( Don't ask.)
I determined that the easiest way to accomplish this repair was to drop the dash
and see what was going on behind. Well a lot went on in times gone
by. Vacuum lines were missing, disconnected, spliced and all dry
rotted. I ripped them all out and with a diagram in hand re-tubed the
mess. I decided to provide the vacuum assist (that the service manual
claims is required for the 'Deluxe Heater' to work properly) from the
extra vacuum tank mounted on the firewall for the vacuum operated trunk
release. Along with the primary vacuum coming off the carburetor (as
diagramed in the service manual) it appears that all works as it should and
since repaired is functioning as new.
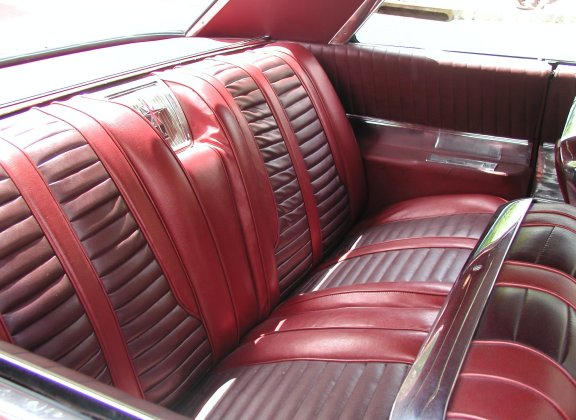
With the dash down I took the opportunity to improve some
cosmetics. I replaced all the dash bulbs half of which were burned
out. One of the many parts that 'V' collected was a front radio
speaker. The old one was totally dry rotted. One of his better
replacement parts was the hard to come by padded dash pad cover. Although
it was blue and not garnet it was NOS. The one in the car was covered in
black vinyl to hide the cracks that commonly occur. I waited for weeks for
the proper colored dye to arrive and am totally satisfied with the result.
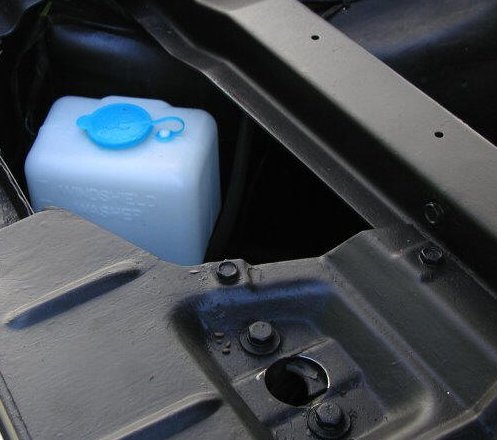
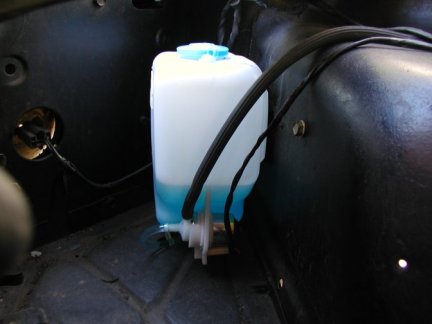
WINDOW WASHER
How quick we forget that in earlier times almost everything
was an added option. For example, in 62 there were three windshield wiper
options: single speed motor, dual speed motor, and dual speed motor with washer.
Being a Starfire it obviously was equipped with the washer two speed motor.
Well I can only conclude that through the years something happened to the
deluxe motor and washer pump and it was replaced with a unit minus the washer pump.
If only 'V' could have found such a unit in his travels because he
was right; there will come a day when a part will no longer be readily
available. I found the factory electrical hook up for the washer pump hanging on the firewall.
Keeping in mind original appearance and performance, I located a universal washer unit with pump included. It is about the same
size as the original reservoir and mounts directly in the stock location.
I wired it to the stock switch and it works like new. I just have to paint
the reservoir black and few people will know that it is not original. When
I have a few extra bucks the look will be completed with the purchase of the "Optikleen"
Triangular Glass Bottle with cap and decal that snaps in place along side the
reservoir. In short, it's an extra container of Windex in case you run
out.
SPEEDOMETER/ODOMETER
It appears that it will be a long time before I can
financially repair this dilemma. It has not worked for a looong time.
When I had the dash down, I spun the speedometer manually and smiled to see the
green wedge progress from left to right. The cable as well was not broken.
The only place to check was at the tranny. I removed the driven 'lollipop'
gear unit and all was intact. Further inspection showed the problem is
that there is no Speedometer Drive gear on the rear of the internal transmission
shaft. Talking with experts I learned that the gear is pressed on and
retained in place with snap rings to either side. I know that 'V' had the
Trans rebuilt awhile back but I think the speedo wasn't working prior to that.
I can only guess as to what earlier went wrong. The 'Slim Jim'
Transmission does not have a removable tail section. To fix the problem
the entire trans must be removed and disassembled to install the gear. I
was sitting down when I was quoted a price and jokingly said not to expect me to
come in tomorrow to have it done.
6/28/10
TO DO LIST
I have been driving the car more regularly to discern it's
reliability, overall condition, and have been making general mental notes of
whatever performance inconsistencies might develop. Most recently a
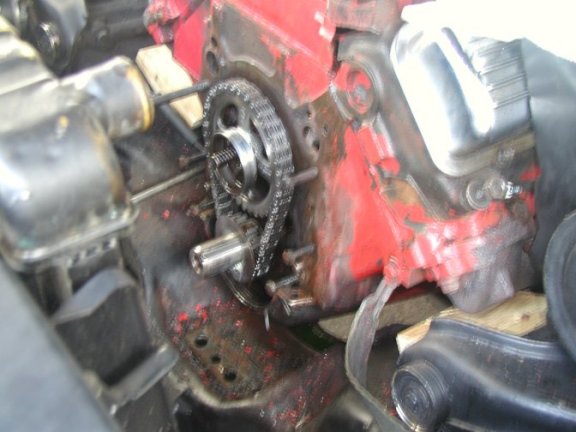
tapping noise has returned to the front of the engine. It is not constant
and varies under load conditions. I have concluded that the problem is a
bad timing chain and that the aggressive sound I initially heard when replacing
the fuel pump was not primarily the shortness of the pump arm but rather that it
was causing an internal condition that brought the loose timing chain to the
forefront. I have purchased a new chain and crank sprocket.
When I get around to it, I will take apart the front of the engine to see what's
going on and replace the parts mentioned.
AS IT LOOKS TODAY 7/1/2010
SEEK AND YE SHALL FIND 7/2/10
I decided to take down the fuel pump to confirm my feelings
that the timing chain needs replacing. I first checked my weld work on the
fuel pump arm and was proud of the work I did for it shows no signs of metal
fatigue. I finger checked the timing chain and sure enough there is far
too much slap in the chain. I started to disassemble the front of the
engine. I'm certain you know the sequence of disassembly.
I knew
this in advance and still can't believe it yet. Fel-Pro makes a front
timing chain Gasket Kit for the 394 and also a Pan Gasket Kit but does not make
a water pump gasket nor is it included in the others !! After removing the
water pump ( yes someone was there before), it was without a gasket and
sealed with silicone. The shocking discovery was that the harmonic
balancer was loose. I took out the bolt with little effort and the
balancer came right off in my hands. Enough work for today.
I found on line a service that I am going to use to solve the
harmonic balancer problems. Not only does it have a loose fit to the
crankshaft but the vulcanized rubber has dried up and there is some movement of
the balancer weight. Dale, in Salem, Oregon repairs balancers and
also provided a solution for the looseness to the crankshaft. I'm most
impressed with what I saw, read, and heard Dale tell me personally. He can
be found at www.dalemfg.com
7/7/10
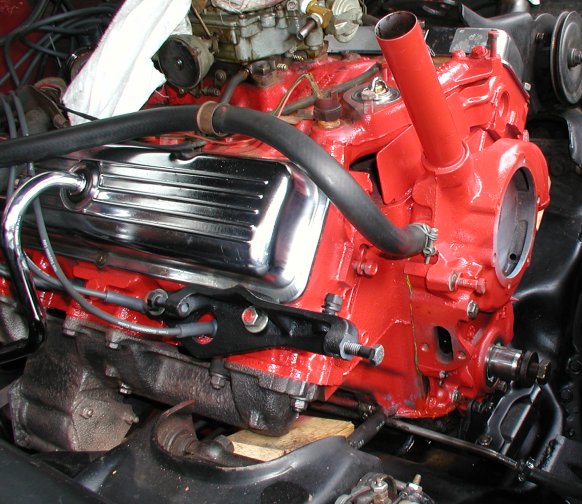
At this point all disassembly has been done. I located
and purchased what I thought were the last remaining required parts: camshaft
gear and water pump gasket from Kanter Auto Parts located here in North West New
Jersey. After installing the timing chain and gears, I realized that I
would be a fool not to install a new front motor mount. So another order
to Fusick Auto Parts and while I was at it, to save future shipping cost, I
purchased some accessories previously referred to.
While waiting for parts, because everything is a 'Special
Order', I degreased, primed, and painted all of the removed parts.
It appears that this repair will lead to a motor detailing as well. I have
often said that the repair of older cars takes on a life of its own. Like
a child they require financial support while they lead you to the next
adventure. I'm not complaining just noting.
7/8/10
Still waiting on the harmonic balancer but made progress.
7/12/10 Murphy's Law
The harmonic balancer was installed and all went well. Eager
to finish, I hastily grabbed the water pump and what I thought were the proper
mounting bolts. Instead I used the longer bolts meant for the fan and spacer to
the water pump. I cranked down some bolts and cracked the cast iron timing
cover casing due to the bolts being too long. The setback has caused me time
and money. I removed the balancer to remove the cracked timing cover. I'm now
looking for a replacement to carefully finish the job.
7/16/10 Live and Learn
I was surprised to learn that the timing cover is pretty
interchangeable. While shopping for another timing cover gasket set, I
noted that the same kit applies for years 49-62; that includes the
303,324,371,and early 391 blocks that all use the round water pump. I
found a cover that was listed for a 56 Olds application and after close
inspection was convinced that but for a mounting bolt on the drivers side there is no difference. I'm
eagerly awaiting the shipment to confirm my belief.
7/19//10 On the Road Again
There's something about doing things twice: the second time
you know what you are doing. The road test was very satisfying. The
car is quieter, smoother and the timing is much more accurate. Gone also
at idle are all those little rattles. I guess the new motor mount was the
answer. I'm glad I took on the project. I wouldn't hesitate to take
it on a long trip now.
8/01/10
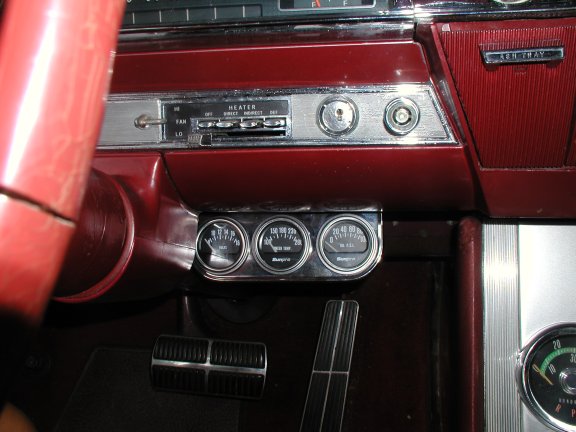
I've decided to add dash gauges to monitor
voltage, oil pressure, and water temperature. To do so I needed to change
the original sending units. I've kept in place the original wiring and
stored away the original oil and water sender switches for whoever wishes to
have things totally original. I'm mounting the gauge plate to existing
holes to the right of the steering wheel and hope that it looks more stock than
add on.
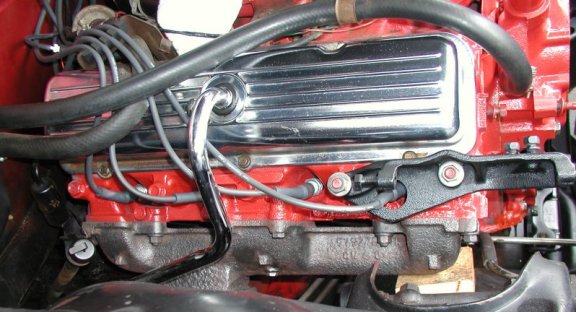
11/10 Carburetor Swap
Although the car was performing well, I felt that there was
some issue going on with the Carb. On the shelf in my garage was my
freshly rebuilt Quadrajet from my 70 Cutlass that always performed
flawlessly. I had a square bore to spreadbore adapter plate and all the
base gaskets I needed as well to do the job in an afternoon. Before long
the car was running and surprisingly had better throttle response and burned
much cleaner. I decided to go with the swap and put the original carb in
storage.
Fabricating linkage for both the throttle and Transmission
were more of a time consuming issue than putting in the carburetor. I want
it to look stock so I took time to not do the job hastily. With the
purchase of some 1/4" fine rod and some eyelet rod ends, all went well.
Having another air cleaner base to adopt to the larger carb opening also helped
to preserve the original appearance.
Learning about the "Slim Jim" Transmission is what really was
beneficial from this experience. The first test drive to test the new carb
was without any T.V. ( Transmission linkage )hook up. The car performed
well and I was shocked to find that the shift from 1st to 2nd. was much less
noticeable than when the linkage was attached. This made me read up on
how this trans works. I chatted with some guys on the National Oldsmobile
Forums and now know what a bad design this tranny was. I learned that the
adjustment of the T.V. rod is very critical to the overall shifting and
performance of the transmission. There is not much to do about the 'dump
of fluid feel' when the car shifts from 1st to 2nd. Slight adjustment is
required to minimize the first shift and maximize the higher gear shift.
It is what it is. It's a shame that such a beautiful car was saddled with
such a poor transmission. I wonder what the 394 would have done initially if it
were mated to lets say a Turbo 350?
3/11 Good Bye
I have always desired a 62 Starfire convertible.
Well, last month listed in JWO here in NJ was just such a car. I went to
see it, liked what I saw, and now it's mine. Sadly something has to go to
make room. The coupe will be sold shortly. Many of the improvements
made on it will be swapped out with the Convertible but not to the extent of
minimizing the Coupe at all.
4/19/11 The
Coupe was sold. It was a bitter sweet experience for me for obvious
reasons. The Garnet Mist 1962 Starfire is now a PAST OLDS. Gone
but never forgotten.

HOME