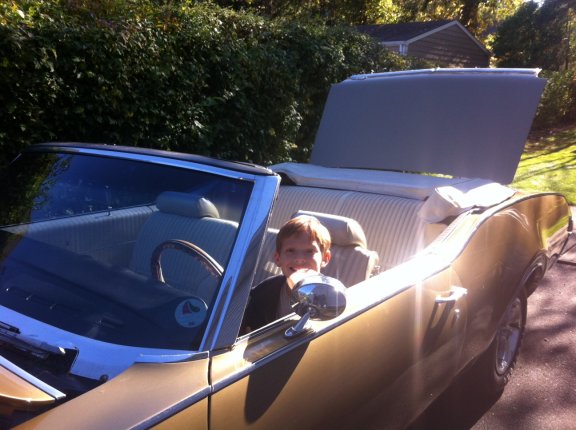
1969 Cutlass S Convertible

My Grandson Jonathan can't wait to drive - - Regrettably his preferred ride is a Mustang. Ugh !!
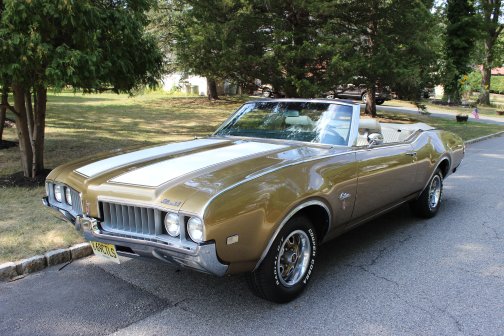
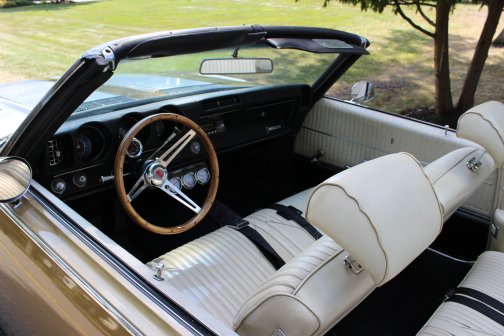
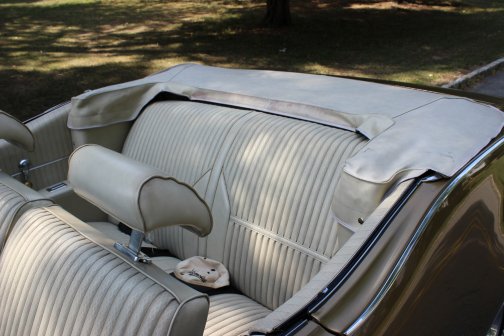
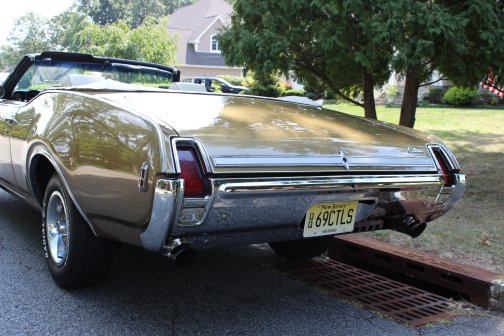
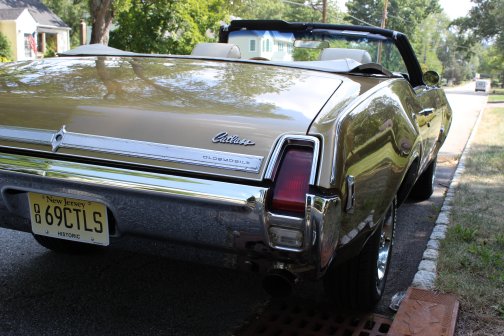
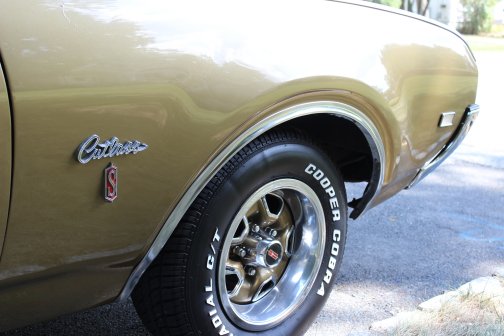
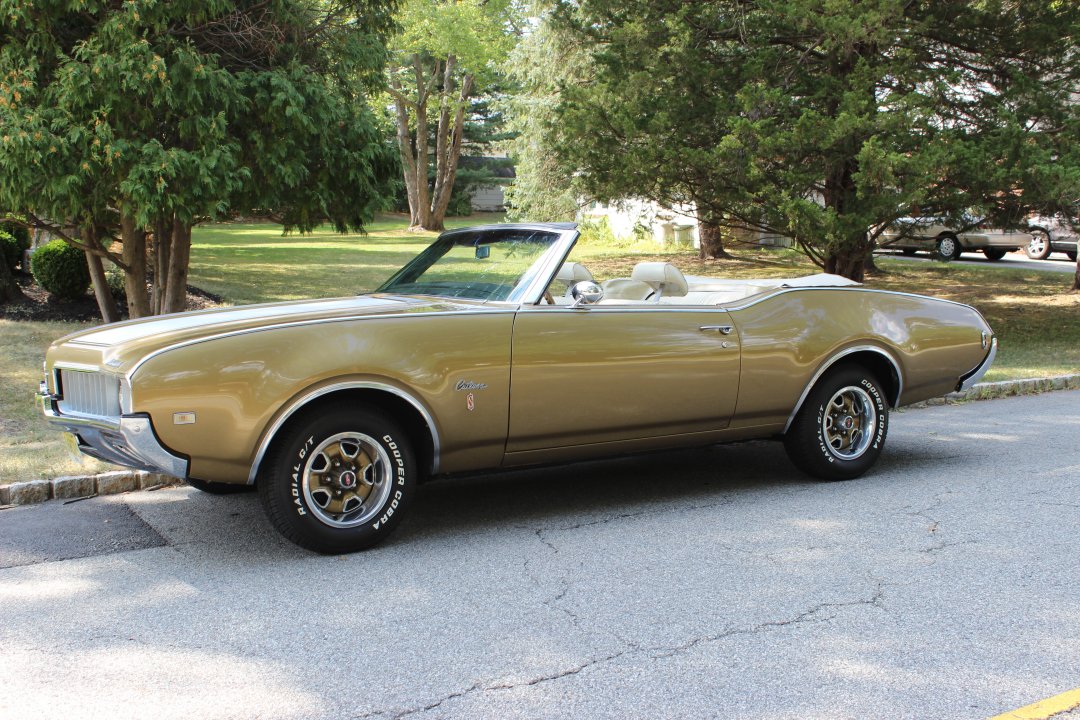
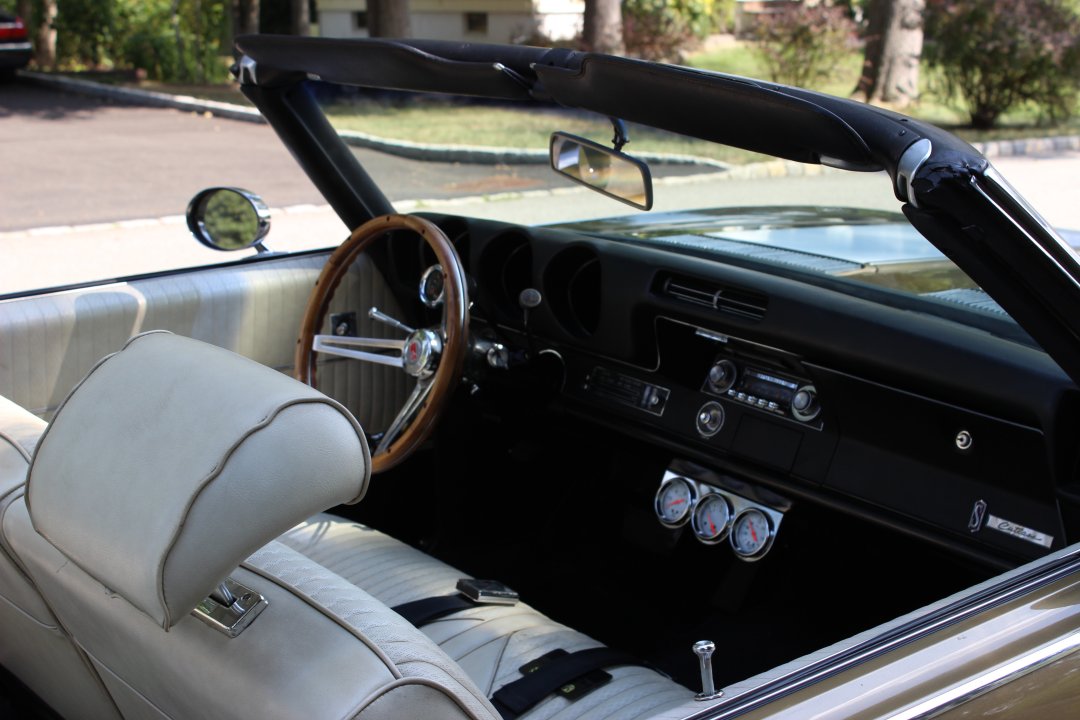
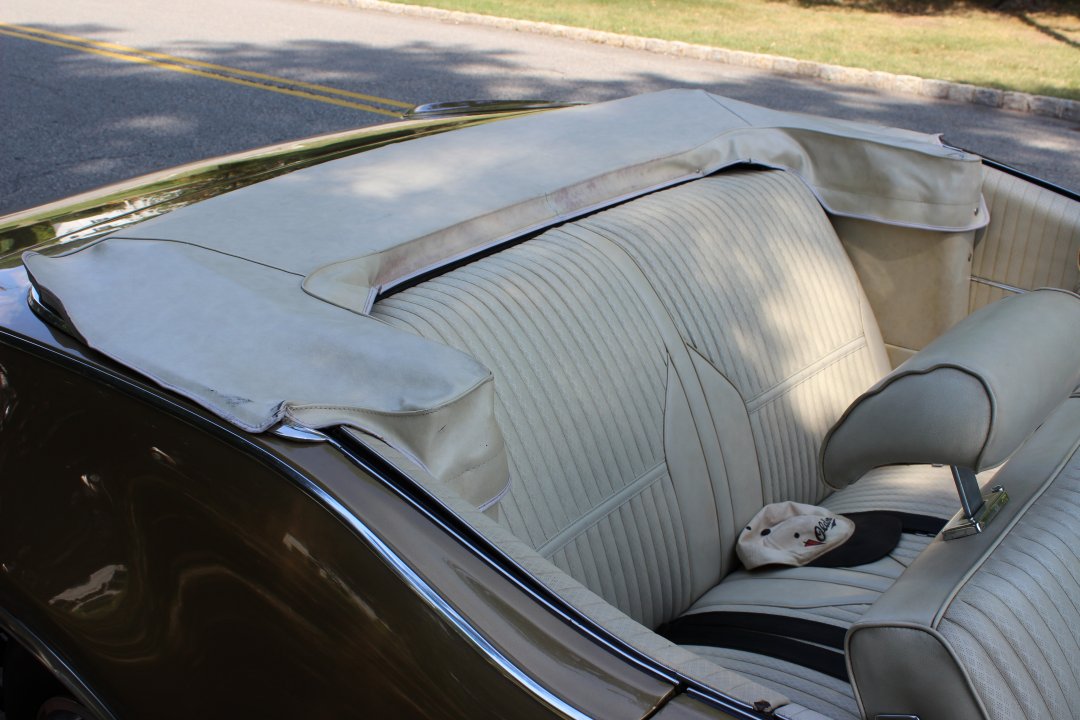
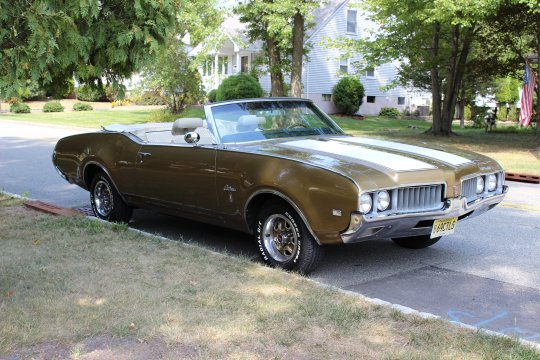
As I have said before, I’m always looking for Oldsmobiles and have learned that surfing on the internet, particularly cars at a long distance, is just wishful thinking. If one is truly interested in a car, the car must be seen in person.
Therefore, I narrowed my search to cars that I can get to in an hour or two. Such is the case with this one. After seeing the car and noting it was all there, I couldn't believe the condition of what still appears to me to be the original paint as well as the lack of rust in the usual body panel locations. The car is the original code 75 Aztec Gold. It has its flaws but it's 46 years old - A true unmolested survivor. My intentions are to make repairs and upgrades on a budget and hopefully sell it this coming cruise season.
Restoration is under way and the following has been completed.
Timing chain replaced
2 barrel carb and intake replaced with Edelbrock four barrel intake and 750 cfm. Carb.
Valve covers replaced with dress up chrome covers
Radiator hoses and heater hoses replaced
Power steering hose replaced
Master cylinder and power booster replaced
All four wheel cylinders replaced and new shoes all around
Engine compartment detailed, proper decals installed, and proper hood blanket as well
Trunk weather stripping replaced, proper trunk mat installed, and a fully dressed Rallye wheel to complete the look
Exterior trim parts will be replaced and/or restored. I was amazed to discover the number of parts I have in storage from earlier restorations. Many of my parts are better than the ones on this car. Swapping will occur.
New bumpers ( purchased )
Emblems and door handles, ( in my inventory of parts )
Tail light bezels and hood moldings, ( to be located for purchase )
Mechanical and Electrical concerns still to be addressed.
Parking Brake cable is frozen
Fuel Gauge pinned to full at all times. Hoping it’s just a break in the sending wire or a bad ground. Will know when examined.
I’m eager to get most if not all of the mechanical issues resolved before winter sets in and it will just be too cold to work on a car outside. I’m hoping for a mild winter.
Update 11/4/14
Having some time on my hands, I started the car to hear and see how the repairs and modifications I made turned out. I let it idle for a while and checked for any leaks. I released the pressure on the radiator and noted it erupted as it did when I first evaluated it before purchase. At that time my quick evaluation was the thermostat as well as a needed flush because the fluid was quite rusty. When I pulled everything apart to repair the timing chain, I removed and flushed the radiator, which is a newer aftermarket replacement, and installed a new thermostat when I put the engine back together. I should have considered the water pump as possibly needing replacement when I had the front of the engine all apart during the timing chain job. Afterwards when checking for leaks I noticed a steady drip right below the Harmonic Balancer. So again I will do some disassembly and install a new water pump. Hopefully all will be resolved shortly.
Update 11/21/14
Water Pump installation went smoothly and all is well with circulation. Have since purchased some upgrades for future install. On eBay I found a new aftermarket R.H. window regulator and am waiting for delivery. The one in the car is spinning it’s gear. As well, in Florham Park I found a better trunk molding. The molding is pot metal and corrodes badly in time. The one on the car is bad and the replacement is better than usual for a daily driver. Will install in the Spring. Winter appears to have arrived early and it’s too cold to be outside handling metal.
Update 11/24/14
I finally got a warm day and a helping hand (foot) to bleed the brakes. All went well until I got to the front drivers side. I knew something was up for after backing out the bleed screw no fluid came out and no lack of pressure was noted at the peddle. I then realized why the car pulled to the right when stopping. I pulled it apart today and found that the soft line was blocked. Removed all lines and replaced all with new. Waiting for a warm day and a helping foot to bleed the system again.
Update 11/28/14
I think I'm getting close to the final purchases required to bring this car to the next level of restoration that my budget will allow. I just found a double set of SSII Center Caps for the car. The ones on the car are badly pitted and the soon to be delivered replacements appear to be a good daily driver quality upgrade. The last eyesore to be addressed is the tail light bezels. Like the trunk molding, the bezels are pot metal and are very prone to pitting. The ones on the car are bad. I found an acceptable used pair on eBay. I'm waiting to hear back from the seller because it appears he wants local pick up only and will not ship. Don't know why it's hard to put two parts in a box, stuff it with paper, seal it, label it, and drop it off at the Post Office.
Update 11/29/14
Heard back from seller. He thanked me and corrected his error: shipping is free!
Update 11/30/14
I couldn't risk losing so I bought the pair of bezels at the buy now price
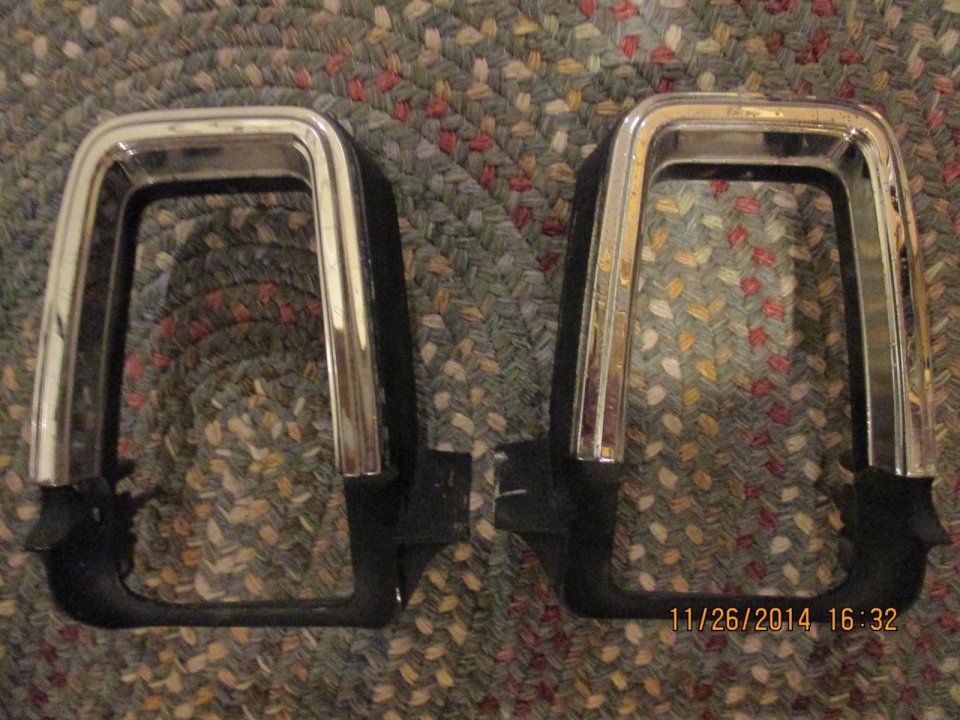
This picture doesn't do them justice. I can't believe the quality for a pair of 'daily driver' tail light bezels.
I had some time to do some
1/3/15
I ordered more parts today. Found some good deals on-line with free shipping. Waiting for the delivery of: shocks all around, rear coil springs, coil insulators, tachometer. Haven't found a good deal on front coil springs yet.
1/5/15
Purchased front Coil Springs at Wholesale Closeout Price today-- Moog. Hope I'm finished buying and get some better weather to start installing the garage full of parts I have for this car.
1/14/15
Purchased front coil spring insulators and exhaust trumpets. More parts !!
1/22/15
I know I should stop but winter is to blame. Too much time to surf anything Oldsmobile on the internet. I find deals too good to pass up and as a result I keep adding to the cash outlay on this car. I know, I know, I know!!! Found a good used rear sway bar on Craigslist in Mass. for $50. USPS shipping another $20. I think $70 is not too much to improve the stability of the car. Hope I'm right.
As well, I bit the bullet for the most noticeable trim parts that eventually have to be replaced - the hood and fender extensions. Brothers Auto Parts ( BAP ) had the best pricing. As well included engine compartment decals and hood blanket to the order.
The only issue undiagnosed is the fuel sending unit. All I can do now is wait for Spring to arrive to start working on the car. Hope it's a short Winter.
2/8/15 After asking about the fuel gauge issue on the Olds Forums that I'm registered with, I was instructed on the quickest and easiest method to pinpoint the cause. The connector wire from the gauge to the sending unit is located in the trunk below the trunk latching mechanism at the point just above the rear license plate. I disconnected the wire and grounded out the plug end going to the gauge. With the ignition turned on, the fuel needle no longer was pinned beyond full but showed the tank to be empty. The problem therefore is either the ground wire of the sending unit or the sending unit itself. When the snow melts and warmer weather prevails I will eagerly make the repair.
Update 3/13/15
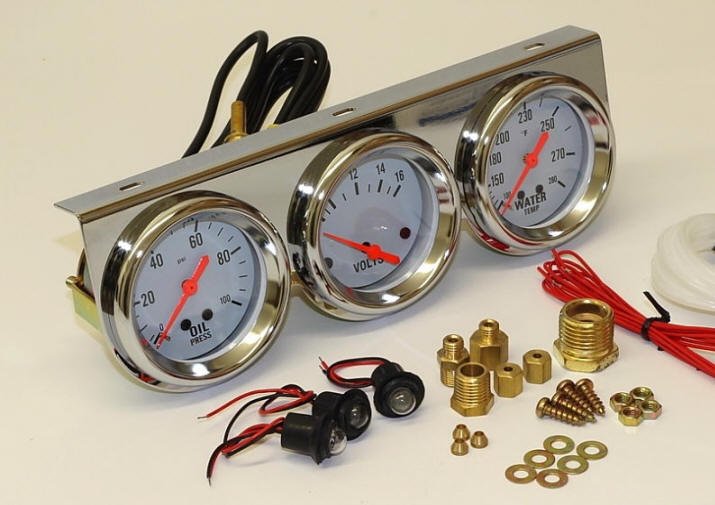
I'm starting to work on the car as it appears Winter has finally let up. I installed the interior additions: Tachometer and Gauges. The parking brake issue was the front brake cable. It was locked up probably due to rust and undercoating. The brake cable was a challenge to replace as well as to my backyard mechanic techniques and savvy but patience and perseverance got it done.
The plan going forward is to move to the rear. I will be replacing the rear coils and shocks, and installing a rear sway bar. I'll be on my back for awhile.
Update 3/20/15
Off my back. Coils, Shocks, and Sway Bar are installed with less than expected setbacks and difficulty. I decided to stay at the back of the car and tackle the fuel sending unit issue rather than go up front and finish the suspension of the car. So I took the bumper off ( it has to be replaced anyway). The gas tank strap bolts were the problem. They were rusty and refused to free up. I cut them with a hack saw blade and dropped the tank. After carefully removing the rubberized tank blanket, I found a note left to me from an assembler on the line noting the date and time of his second shift.
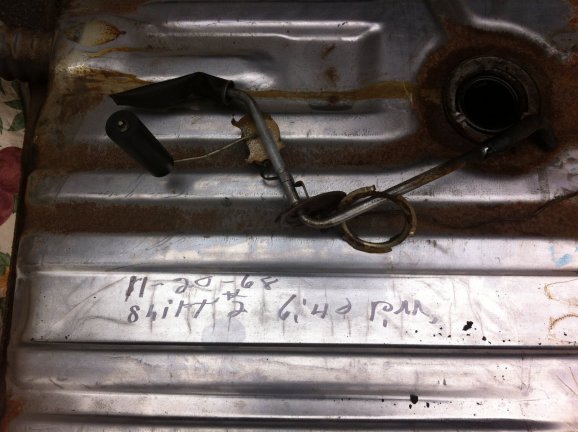
Further testing of the ground through the unit proved that the sending unit needs to be replaced. New sending unit and strap bolt kit have been ordered and I'm waiting for delivery.
3/25/15
The sending unit arrived early and has been installed and operating perfectly. With the help of Frank Sr. I have the tank back up and held in place with a jack. The bolts will arrive today. In preparation for the work to be done upfront, I have removed the bumper and all grille sections. As well, I can't wait for the registration and QQ Plates to arrive from Motor Vehicle. I've never known them to be expedient. Getting pretty close to a test drive.
4/2/15
The tank is back up with proper bolts and nuts that were used in the day. Struggled for a few too many days installing the front coils but got it done safely. New shocks were installed as well. Determined that the outer tie rod ends were bad so new ones were purchased and installed. As well one of the front stabilizer end bolts snapped when disassembling, so new Moogs were installed on both sides. I'll be moving on with the installation of the refurbished front grille and new hood trim moldings to finish up the front.
4/12/15
The car has come a long way. All the major issues so far have been resolved. I have now moved onto the little issues that every classic car owner deals with: a horn that doesn't beep. a slipping window regulator, a blinker bulb contact, etc. My goal is to have the car totally functioning. The horn issue required the fabricating of an upper contact to the newer Grant Steering Wheel. I bought a window regulator during the winter. After taking off the door panel to do the job yesterday I was shocked to discover that the panel had never been off in all these years. The paper barrier was still intact as original. Another example of the unmolested condition of this true survivor.
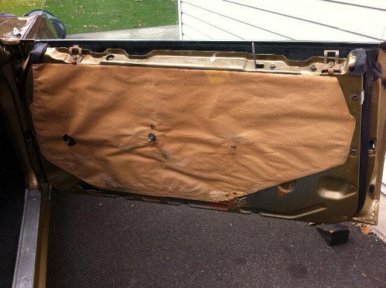
As well new exterior door handles were installed to replace the badly pitted original ones.
A new hopefully minor issue developed with the down shifting of the transmission. A noticeable bump occurs upon coming to a stop. I'm being told it's the vacuum to the modulator which could be affected by the change of intake manifolds and the point at which I'm drawing vacuum.
4/17/15
The trans bump downshift problem has been fixed by doing the following:
1. Replaced the vacuum hose from the carb to the metal vacuum line that leads back to the modulator. 2. Replaced the original modulator and hose with a new AC Delco unit and hosing. 3. Reset the timing and carb tuning to maximize the static vacuum.
The car shifts smoothly and downshifts smoothly as well.
I'm really at the "end of the road." The things left to do are issues that bother me more than having anything to do with the cars performance or safety
The issues are:
Re-stitch pulled stitching of the convertible top at the rear quarter windows
Replace the clock with the working one that was in the trunk when I bought the car
Test the replacement am/fm Wonderbar radio that was in the trunk as well. If it works I will someday swap out the original am radio.
4/22/15
The clock is replaced and working. The pulled stitching on the top is improved but not perfect. It will do for now. I have to be mindful that it's a daily driver and not a trailer queen.
4/26/15
It appears the extra radio that was in the trunk ( am/fm wonderbar ) does not work. The original works fine so nothing further will be done.
Installed the right side mirror that was in the trunk when I bought the car. New and from Fusick. Still have not received the"QQ" plates and registration from the State. New Jersey Motor Vehicle at its best! A minor issue developed that haunts my need for total functionality. The in-dash left blinker indicator stopped blinking. I checked the bulb and it's fine. I'm sure it's a ground issue. I've been on my back hanging over the seat with my head under the dash long enough. A job for another day.
5/1/15
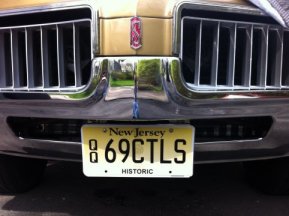
The plates finally came and the car was added to the insurance policy. The next logical thing is to drive it and monitor every aspect of the unknown. Got gas, drove it around town, got on the highway for a short bit and all went well. Thought perhaps the operating temp was a little high but no overheating or blow off issues occurred. Went home and did a complete visual check of all things I could think of. Everything was fine.
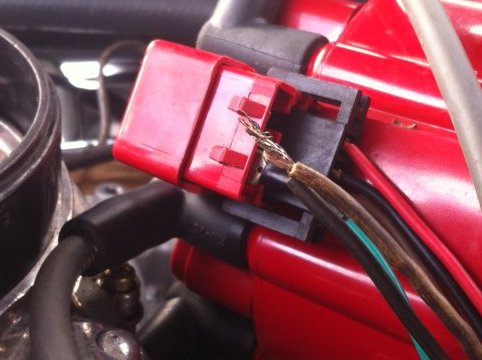
I tried to restart the car and there was no response to the ignition. Battery and all other electrical components were fine. My first thought was the starter motor. Gave it the old hammer test and she cranked but would not start. Checked the fuel supply - Fine. Checked the battery pick-up to the distributor and there was a problem. I had crimped rather than soldered the plug end and the wires were not making proper contact. Took the time and did it right and the car fired right up. Gave it a hardy ( 4000 rpm) rev. to celebrate.
Decided that another test drive was in order. While backing out off the driveway I see a puddle of anti- freeze. Shut down, pop the hood, and engine is covered with fluid from the blown water pump by-bass hose ( payback for the rev I guess). As an 'Olds Man' I should have known to replace it months ago. Oh well. A trip to Politi's and $7.00 later the fix was on.
In many ways I'm glad all these little things are occurring now rather than later. Nothing worse than an unexpected breakdown on a long trip.
More test drives are in order before my confidence will be reassured as to the car's reliability.
Things to Do: Have someone replace the tail pipes with the proper Trumpet Tips and relocate the pipes to exit in the bumper cut - outs.
Wish list: Swap out the Edelbrock carb for a Holley. I'm starting not to like Edelbrock.
5/4/15
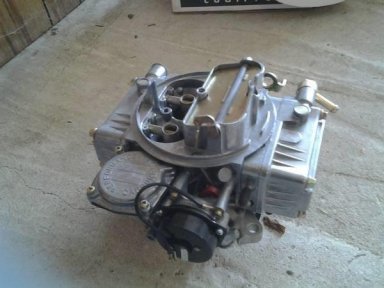
More driving made me make decisions sooner than I planned. The starter motor issue happened again and made me realize it's a heat issue for when I wait it out the car starts. So I decided to order another starter motor and a starter motor heat shield wrap to solve that nuisance. Waiting on delivery. As well, starting the car requires too much cranking before it starts. Edelbrocks seem to act that way. I also realize 750 cfm. is too much anyway. I found a newly used Holley 600 cfm. 4160 series carb. on Craigslist. As soon as it comes I'll swap out the carbs.
5/5/15
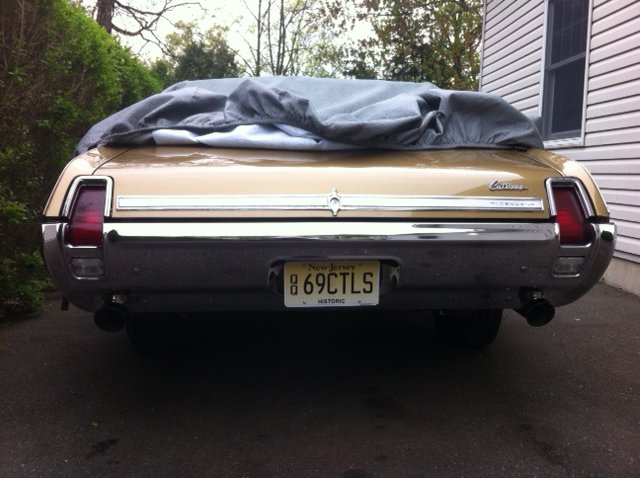
Exhaust pipe work done today. Trumpets and new pipes from rear axle installed
5/6/15
Rockauto.com delivers faster than Amazon. Order today and get it almost tomorrow! On my doorstep this morning was a new starter motor. Just finished the install and all is well.
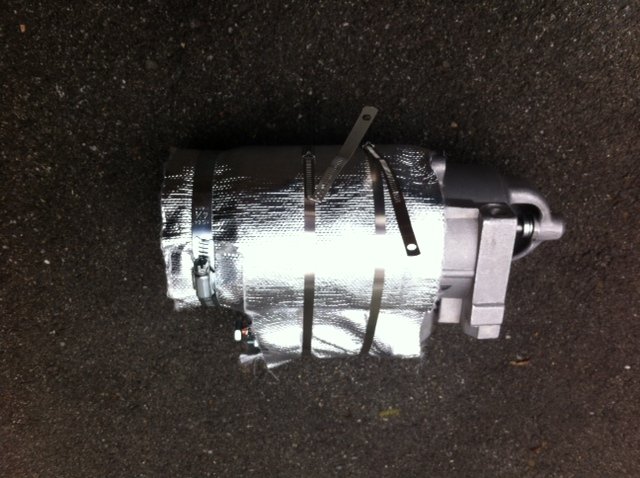
Heat shield retainer strap ends will be trimmed before installation.
5/12/15
I'm trying to resolve a timing issue. After an initial set and driving for awhile, I've noticed that the timing retards 4 to 6 degrees. The distributor is aftermarket so many factors can be at play. It is possible that the machining is such that the stock hold down plate is not able to clamp any tighter. It made me think that perhaps a distributor shim will do the trick and add the necessary extra thickness required to hold it securely. Will do today. If it doesn't work I think a new distributor is in order.
While researching, I read as well about the resistor wire replacement that is recommended on a point type to HEI distributor swap so as to insure a full 12 volts to the new unit. With a volt meter I tested the supposed 'resistor wire' and it reads 12+ volts. ?? Go figure. No need to replace but I bought the proper pigtail connector for the tach and battery wires to the distributor.
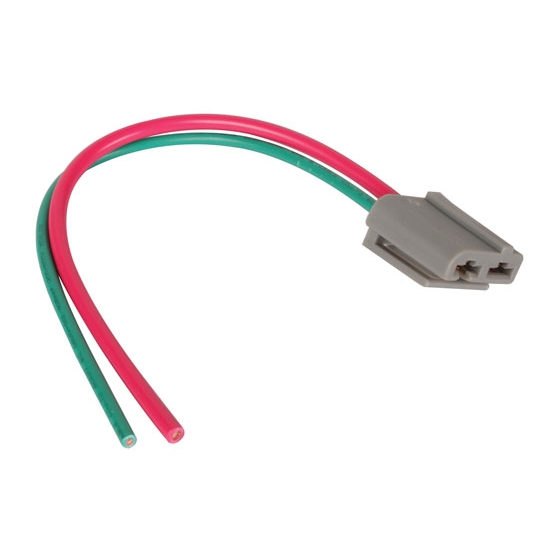
Made a shim from gasket material that I had. As well I replaced the hold down bolt and added a lock washer. It appears to have solved the problem. I'll know soon after some driving.
5/13/15
Timing seems to be holding. I'm experimenting with how advanced I can go. I'm uneasy about the operating temperature. On the street it's ok ( just under 200 deg.) but on the highway the temp increased almost to 220 yesterday. The radiator is a cheap replacement that I think can't handle the flow. I'm considering a new all aluminum one from Summit.
5/14/15
Replacing alternator and carburetor today. Purchased proper black distributor cap. The aftermarket red color offends me.
5/15/15
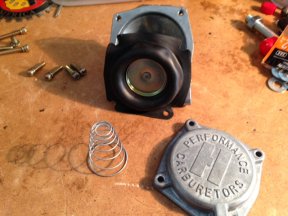
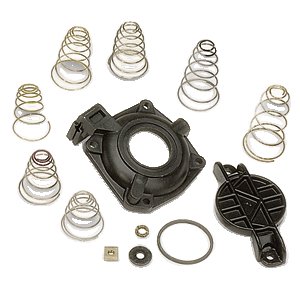
It took many attempts and take apart to get the carb to work right. The first out of the box attempt bogged to the point of stalling. ( I know! what do you expect ? It was used and altered and wrongly adjusted.) I learned an awful lot about a Holley by taking it apart. The first time I took it apart I replaced the accelerator pump and gaskets. The second attempt was a fiasco. It leaked from the rod that transports fuel from the primary to secondary bowls. Took it back apart and learned how to properly reinstall the rods and their seals. The third attempt was better but two issues were noticed: the primary accelerator pump shot was not evident, and when idling raw gas was dripping into the throat from the secondary bowl.
It was the time to call Holley and get Tech support. The secondary dripping was solved by adjusting the float level. The Tech re-explained all that could be wrong about not getting a pump shot so I broke it down again and checked my work. What the tech did not ask is " Did you install the diaphragm in upside down?" At this point I can take this carb apart with my eyes closed. The fourth attempt and all was well. No problems other than fine tuning of the idle mixture screws and curb idle. I'll take it for a ride for more analysis. ......................... After driving I first must say there is a very noticeable difference between Holley and Edelbrock. With the Edelbrock the car felt like a daily driver: with the Holley the car feels like a street performer. I'm noticing a slight stumble off idle and according to Holley that is controllable by changing the pump squirter. Each squirter is numbered ( 25 through 40 or so ) and an increase by three numbers should do the trick. John claims he has many of them in different sizes. Hopefully no purchase is necessary.
5/18/15
Changed the squirter. I had a 31 and went to a 37 because that's what was available from John. Hope it's not too much. If so I need to buy a 35. The numerical sequence after 31 is 32,35,37.
5/21/15
Realized that maybe I'm going in the wrong direction to solve the squirter issue. The 37 didn't solve the issue. Noticed that there was a 28 available to use. Made the change and the car has leveled out with no noticeable stumble. I bought a Summit 'exact fit' aluminum radiator to help the cooling problem. The radiator in the car was a replacement single row with plastic ends. The Summit is a dual row all aluminum construction but not exactly an easy fit. Needed to make many modifications to get it to fit and look stock. Thinking that if I bought the universal one they offer for $100 less I would have done the same mods. for less money. Oh well.
5/26/15
Ever since I could monitor water temperature with the new gauge, there has been fluctuation in temperature between 195 and 210 +. At the time thought it could be a few things: the undersized radiator, or the quality of the gauge or its placement within the intake manifold. After upgrading the radiator to an all aluminum dual row from Summit, the problem still existed. Peter always seems to be on target. He suggested that the thermostat was either the wrong temp. or not operating properly and that he would change it. Today I changed the thermostat from a 195 to a 180 degree unit. The temperature reads 190 consistently without any fluctuation at all. Very pleased. Thanks Peter.
I'm waiting on what I hope is the end of performance improvements that will restore my confidence in this car as a daily drive anywhere vehicle: new spark plug wires that hopefully are a better fit than the last set I bought, and a yoke style distributor hold down device rather than trying to get the stock one to hold fast the new billet distributor.
6/3/15
Spark wires made a great improvement visually as I was able to route them attractively to the distributor. The after market distributor hold down was a flop. Someone should tell them the part does not work with an Edelbrock intake manifold. As a result I learned how to set the stock clamp today. Hoping it will hold fast.
7/10/15
Driving the car more and even considered taking it down the shore. Some issues have developed however. This past Tuesday I put more gas then usual in the tank. Went to a show and was told by someone that he smelt gas when walking to the rear of the driver's side of the car. I looked under and didn't see any signs of leaking. The following morning my wife tells me she smells gas as well. Again I looked under and sure enough there was a steady slow drip from the corner of the tank. I siphoned out the gas to the level below the seam of the tank and the leak has stopped. Waiting on the delivery of a new tank and the eventual installation before me.
As well I'm questioning the safety of the tires. Although the treads and sidewalls look good, I have now developed a shimmy after driving the car on the highway. Thinking that the internal integrity of the tires is deteriorating. Much to consider.
7/15/15
New tank arrived with a ding in the bottom of it. Although it is not punctured, I'm concerned that early rusting might occur as a result. Asked for an exchange and have to wait for the eBay handling procedure. As well, I jacked the car up yesterday and inspected the front tires. There is a serious flat spot on both tires. Bought four Cooper Cobra GT's
7/17/15
New tank on its way with no return required. I've got a new yet dented tank in reserve. Tires are on their way as well.
7/22/15
Tires arrived yesterday. New gas tank and straps installed today.
8/12/15
At this point it's become obvious that I'm not selling the car. I've done too much to the car not to enjoy it as a daily driver rather than another covered collectable within my garage. I have purchased for installation within the next two weeks the following parts:
front upper and lower control arm bushings
idler arm
upper and lower ball joints
all 8 rear control arm bushings
The work will be done at Freeway Tire and Auto Repair in Dover, NJ. As well, the tires will be mounted, balanced, and finally wheel alignment. At that point the car can be, with peace of mind, driven anywhere.
9/2/15
Car is in for suspension work and tire replacement. As well I'm waiting for delivery of a Striping Kit from Phoenix Graphix. I guess I'm making it in appearance a 442. So what !! It's my car and I'll do what I want to it.
9/4/15
Car is back and drives very well. Later in the day, Peter spoke with the mechanic who did the work when he showed up at a car show. He said he was very happy in how the car turned out and that it drove excellently. I can confirm. Drove it all day putting it through its paces to insure myself that I'm finished with it and can just jump in, turn the key, and drive it as carefree as driving today's car. Putting white rally stripes on the hood and deck lid next week.
9/16/15
Rally Stripes done. Went very well. I can now add another skill to my resume. Tried both application methods: dry and wet. Wet is definitely an easier and more precise way to do the job with fewer to no bubbles to work out and remove.

Update 12/15
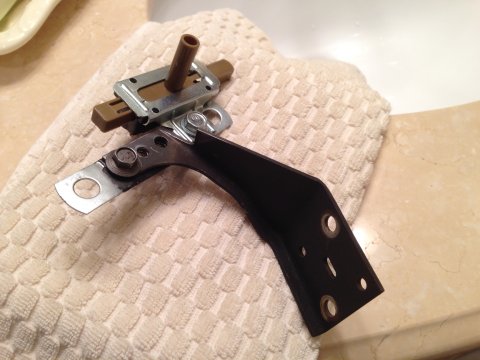
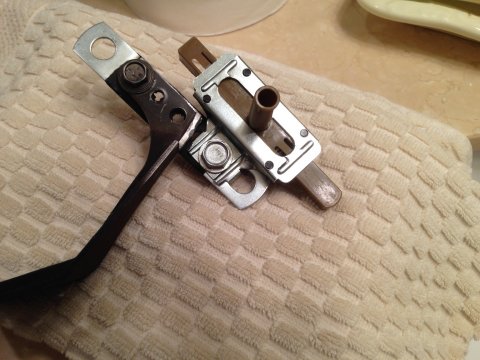
I did not see any signs of replacement or tampering that would explain the lack of contact. Can only assume that after 40 plus years, the arc of the pedal was stretched out.
12/20/15
I was thinking of the forced cold air induction
system that Olds introduced in ’68 that was packaged along with a hotter cam and other
performance upgrades and called “The Ram Rod” or W-31.
You can buy a repro of the cold air induction system for about
$800.00.
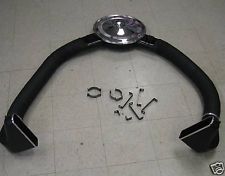
So I started searching for alternatives. I came across a kit offered by Spectre Performance that has a chromed 14” dual snorkeled air box with tubing, clamps, and couplings for $150.00.
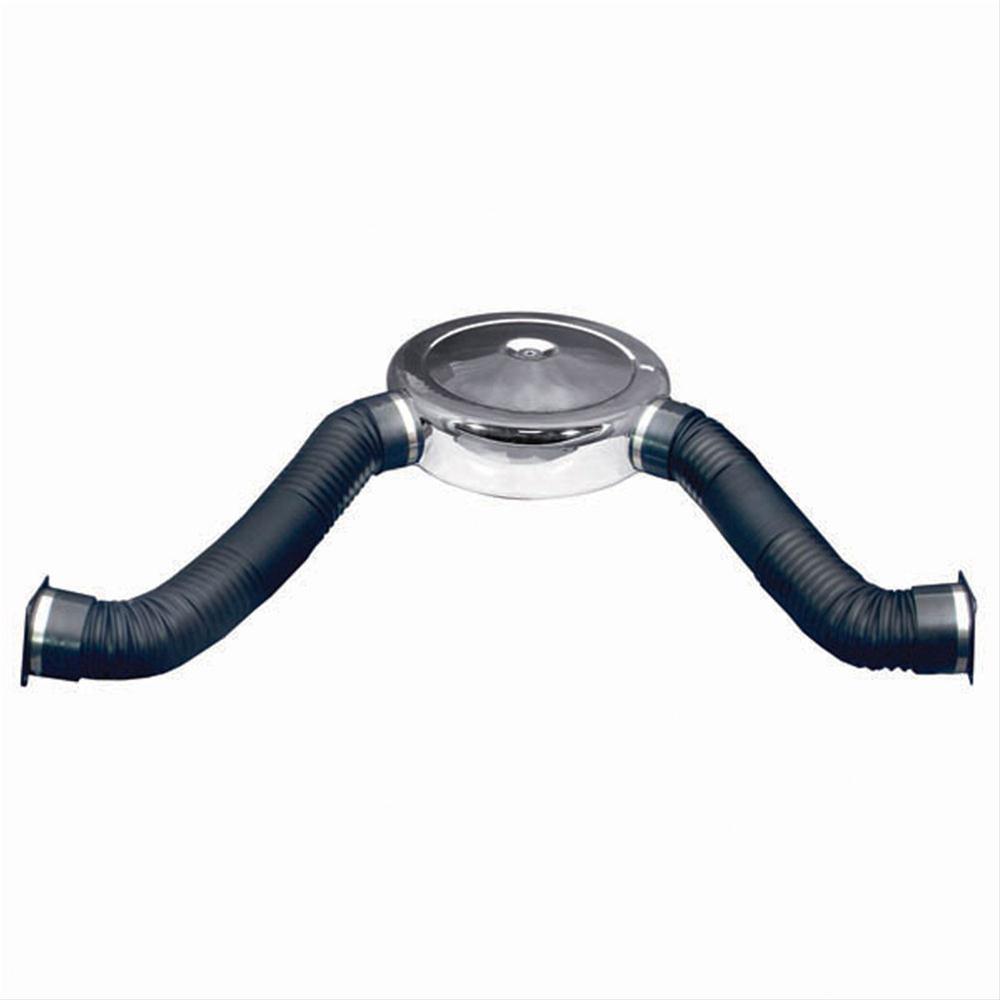
The next ‘what if ’ thought that entered my feeble
brain was:
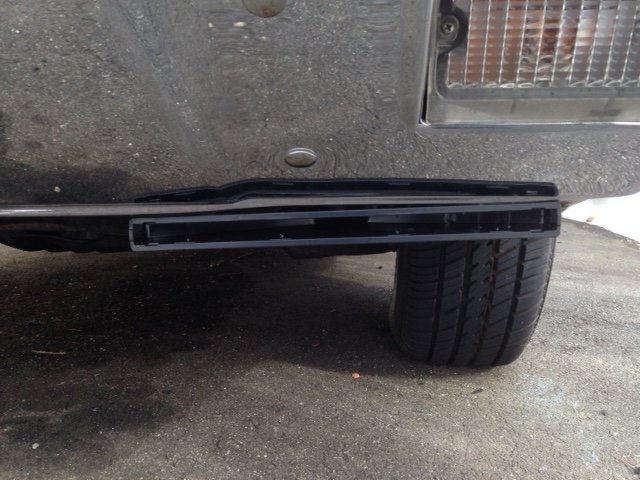
I perhaps can also fabricate those cool looking under the bumper
scoops that the ’69 Ram Rod had.
However, all I could come up with were clunky looking
things that were visually unacceptable.
I needed to think outside the box.
I saw that the ‘originals’ look a lot like a shop-
vac's water suction attachment.
A trip to Home depot and my ‘what if’ seems to be not as
‘hair brained’ as I first thought.
Aside from not yet figuring out how to securely mount
them below the bumper, I’m getting creatively challenged by the possibility of
this all coming together and looking pretty damn good.

One of the worst things about Winter is not being able to work on a car. Let me clarify. I could put the '69 in the heated garage and work on it but that would necessitate taking one of the others out and exposing it to the elements. I can't guarantee that I could do the work in one day to put cars back to where I'm comfortable. So as was the case last Winter, I find myself buying and storing parts for repairs and improvements.
The solenoid arrived and I confirmed that it is correct for the '69. I went to Fatsco's Transmission Parts in Montville and purchased a new pan gasket and filter for when I do the job. I've learned that I've been wrongly calling the 2 speed tranny a 'Jetaway'. The name 'Jetaway' was used for the generation of Oldsmobile transmissions during the late '50s. More specifically in the late '60s the two speed trans for GM was the ST300. On Olds websites I've read of them being described as TH300's although when researching for parts, no where do I see a referral to a TH300 ( Turbo - Hydramatic) but rather ST300 (Super Turbine ). Learning something new is good!
2/01/16
Ram Air installed on top side. Next to do is install the scoop collectors on the bottom side.
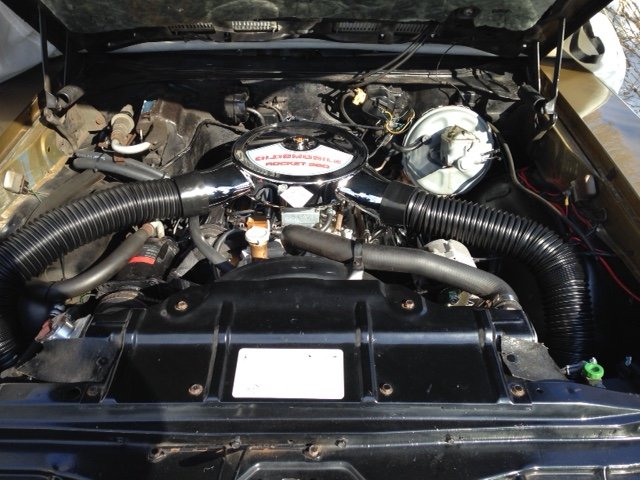
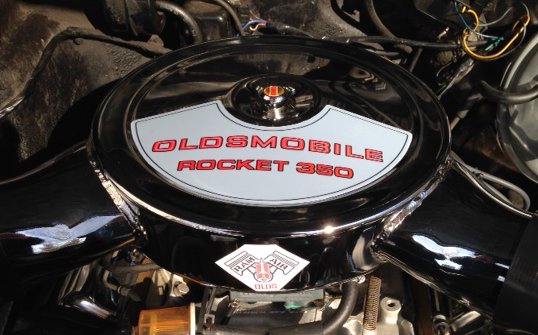
Not wanting to fib and use the factory "Ram Rod" logo, I designed my own.
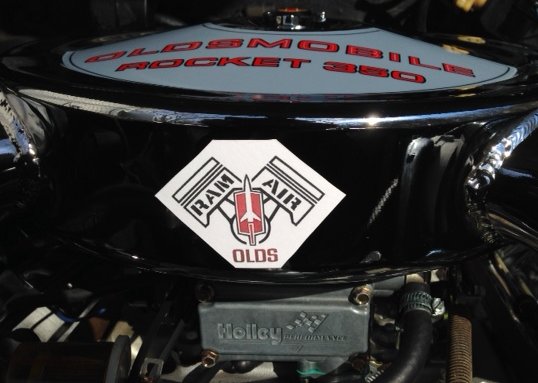
Air Collector Scoops installed.
I failed to mention that the after market window regulator that was earlier installed has twice caused some problems. The roller is a ball and socket type and occasionally pops out after closing the door. Awhile ago I bought a replacement roller of a better design and replaced it today. Hopefully I will not have to repeatedly tear down the door trim to fix the problem anymore.
Haste makes waste. I thought about the kickdown switch and recall when bench testing the new solenoid there was a distinctive mechanical click when the electro - magnet was activated. So before dropping the pan and replacing it, I realized that I should activate the installed one and listen. The result was positive; I heard a clicking contact sound. I will not be dropping the pan and replacing what's not apparently broken. Need to test drive it again and test for kickdown.
Before driving it regularly this coming warm weather seasons I'm planning the following upgrades:
Convert the front brakes to disk
recharge the air conditioning system
2/02/16
Routing the cold air tubing required me to remove the original windshield washer reservoir. Because of its design it cannot be mounted in a different location. I bought on eBay a used late model Olds reservoir that can flat mounted to the inner fender well. The original will be put in the growing collection of original parts.
I bought a disk brake conversion kit from Dave at www.rodtiques.com that allows the use of the original 14" wheels. He's a distributor for http://www.getdiscbrakes.com/ out of Ohio.
' The Right Stuff Detailing' E-Z Fit Brake Kit '
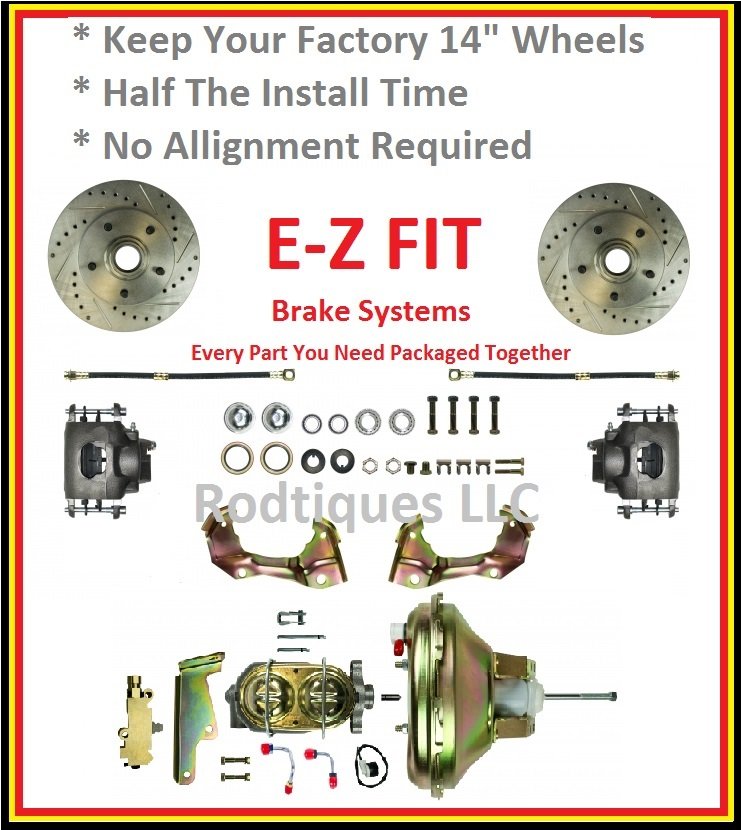
2/04/16 The disk brake conversion kit came yesterday. Still waiting for the complete set of new brake lines. I was thinking to use the existing in place lines but now realize that's not possible. There are so many differences that it's easier to rip it all out and start anew. I loosely 'bench installed' components and am very impressed with the quality and fitment of the parts. I'm hoping as a result the swap out will be one of my easier improvements on this car. Hope to find out soon if the weather co-operates. Before and after pictures will be taken.
Bought a new AC accumulator/dryer on Amazon today. Price was under $20.00. Getting parts together to retrofit AC to R134.
2/7/16 Started the brake conversion by first removing the Master cylinder and Booster. A real knuckle buster! Probably will be the most challenging part of the entire job: we'll see.
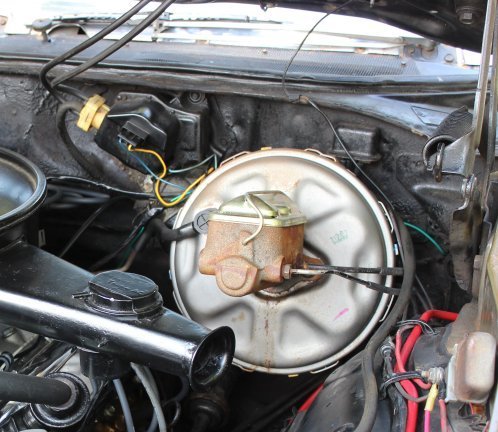
Before After ( Initial Install with no lines )
2/12/16 Update The brake lines came the other day and I spent some time loosely fitting some to the proportioning valve. A bit of a challenge but doable. Realizing that before swapping out the drums for disks, I had better get the lines in first. Once the weather gets more agreeable, I can get under the car and install the remaining lines: from valve to passenger front, from valve to rear axle, and from rear axle to both wheels. It will be awhile before the car stops on its own.
2/15/16 I have often said that every day should be a learning day. I have addressed earlier the possibility of reduced voltage due to the stock resistor wire used to lessen the voltage to the stock point distributor and said that there appeared to be no issue. Since I've replaced the points with a HEI distributor I need to get it right. I've read more and now better understand how the original wiring works. There are two wires attached to the BATT Terminal on the distributor: One being the resistor wire when the car is running with the key in the ignition position, and the other a bypass wire coming from the starter motor that provides a full 12 volts to start the car when the ignition key is in the start position. It is recommended that the resistor wire be replaced by a 12 gauge wire coming from the IGN terminal on the fuse box. I will do so and merely cap and stow away the resistor wire within the wiring harness to make everything look original.
2/17/16 I'm getting antsy about not being able to work on the car due to the cold weather. I braved it for awhile today to prepare the front for disc installation. Car is up on blocks and I got under to see what needs to be done to get in the remaining lines from valve to the wheels. I then loosely routed the front passenger line from the proportioning valve down along the front crossmember and up and to the mount point of the front passenger side brake line. It appears to be fairly easy to remove the old line from the stock clamps on the cross member and install the new line in its place. When I looked for the rear line from the valve I was shocked to see that there was a non-related issue. The nut to one of the lower control arm mounts was never tightened down. The bolt head is at least 1/2" away from bottoming out! The mechanic at Freeway forgot to double check himself when replacing the front arm bushing job I had done last summer. This is my first to do.
2/19/16 I've decided that the rear line to
the tee on the axle will not be replaced. I discovered that there is an
existing union at the front rail. The new rear line is a two piece unit: one
from the valve down to below the firewall and then connected by union to the
long run to the axle. The new shorter section from the valve is loosely
installed and it appears that by buying another short section, I can then tap
into the existing long run line at its front union point. It appears that
the long line has been earlier replaced for two reasons: not sure that the
original would have been in two sections, and the line is not secured to the
rail! I will have to bolt it down. I will store the new rear long run line
away for when and if a problem develops.
2/21/16 Hope to finish total installation
of disk brake wheel components today. Did the passenger side yesterday and
it went fairly smooth. Driver side should go faster now that I know what
I'm doing. Hopefully all that will be left to do is to bleed the entire system,
check for leaks, and test drive.
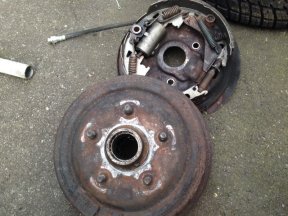
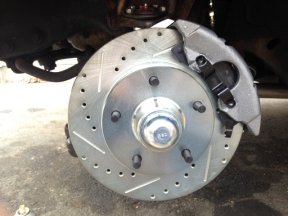
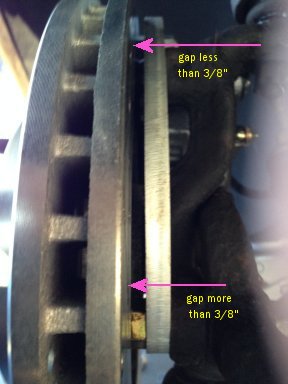
2/26/16 Concerns ! Bleeding the
brakes took awhile and two attempts. I'm still not sure all the air is
removed for the brakes feel sluggish. I'm going to re-adjust the rear
drums and bleed again. More importantly, I'm waiting to hear back
from the tech support at ' Right Stuff'. I'm concerned for the lack of
parallel between the rotor and the mounting plate. There is no grinding
and it appears that the floating action of the calipers compensates but I still
am worried if all is OK.
1.
3.
1/17 Struggled with this upgrade but did it anyway. I never really found the '69 grille to be attractive and substantial enough, yet found the 442 grille to fill the bill in both regards. Maybe because it's blacked out ? Hate the term "tribute car" or "clone". Just think that one's personal taste should dictate how one finishes one's car.
2/18/17 The Grilles, Bezels, and Headlight Housings have been replaced.
Before After
11/3/17 I have struggled with the decision to either replace, or use as is, the convertible top. After searching for top providers ( thinking I could do it myself ), I decided to leave it to the pros. Next week, a complete replacement of all aspects of the top will be replaced: Mike @ Blue Sky Custom Interiors in Little Falls, N.J. As well, I purchased a new boot cover in the proper parchment interior color. Hope I didn't put the 'cart before the horse' as the body is not show quality and the new top may draw increased attention to the cars other flaws. Oh well.
11/7/17 Dropped the car off today at Blue Sky. Mike said it should be done in two days.
11/14/17 Called Mike today. Pads are just being installed. There was a setback. The wrong top was sent and had to be returned and replaced with the right one. Patience ! Might get it back tomorrow.
11/15/17 Picked up the car today. Top looks great. Mike told me wrinkles that I see will shrink out in the sun. We'll see.
11/29/17 The newest development to address is the exhaust manifold gasket on the driver side. I started the car the other day as I occasionally do just to warm it up and let it idle for awhile. I heard that undeniable sound of a leaky gasket. Further examination confirmed that the gasket is 'shot' to the point that while looking at the correct angle I could see the detonation in cylinder 1. New bolts and gaskets are ordered and repeated soaking of the bolts with penetrating oil has already started. The big decision is to replace both sides or only the one leaking? You know the phrase, " If it ain't broke don't fix it". We'll see.
12/1/17 The installation of the gasket went very well. No issues. I decided as well to replace the gasket on the passenger side. The end bolts come out with little resistance. The three center bolts are resistant and have been soaked with penetrant and will be left to soak for awhile. Hopefully all will go as easily as the driver's side.
3/19/21 Collecting, restoring, and maintaining Oldsmobiles has been the passion that drives this facet of my person. However, as I reflect on a statement I made on my Home Page, " But most of all, they need to be driven for all to see and admire", I realize that I'm not living up to it. I therefore realize that it's time to gift, sooner than later, two of my cars.
On April 4th, 2021 I will gift this '69 to my daughter Michelle knowing full well my son-in-law Peter and grandson Jonathan will continue it's care and for sure use it more than I could ever in the future.
![]()